Blog
Setting up e(fx)clipse RCP development for Java11+ and PDE
As I'm currently converting a Java-8 project to AdoptJDK-11 and JavaFX-11+ I thought it would be a good idea document the steps involved.
Prequisits
I assume you have installed:
- Eclipse 2019-12 - download.eclipse.org
- Installed e(fx)clipse 3.6.0 or above - marketplace.eclipse.org
- AdoptJDK-11 - adoptopenjdk.net
- Downloaded and extracted the JavaFX-SDK-11 - openjfx.io
Configure your Eclipse
Java Settings
Make AdoptJDK-11 the default JRE unless it is already the default. 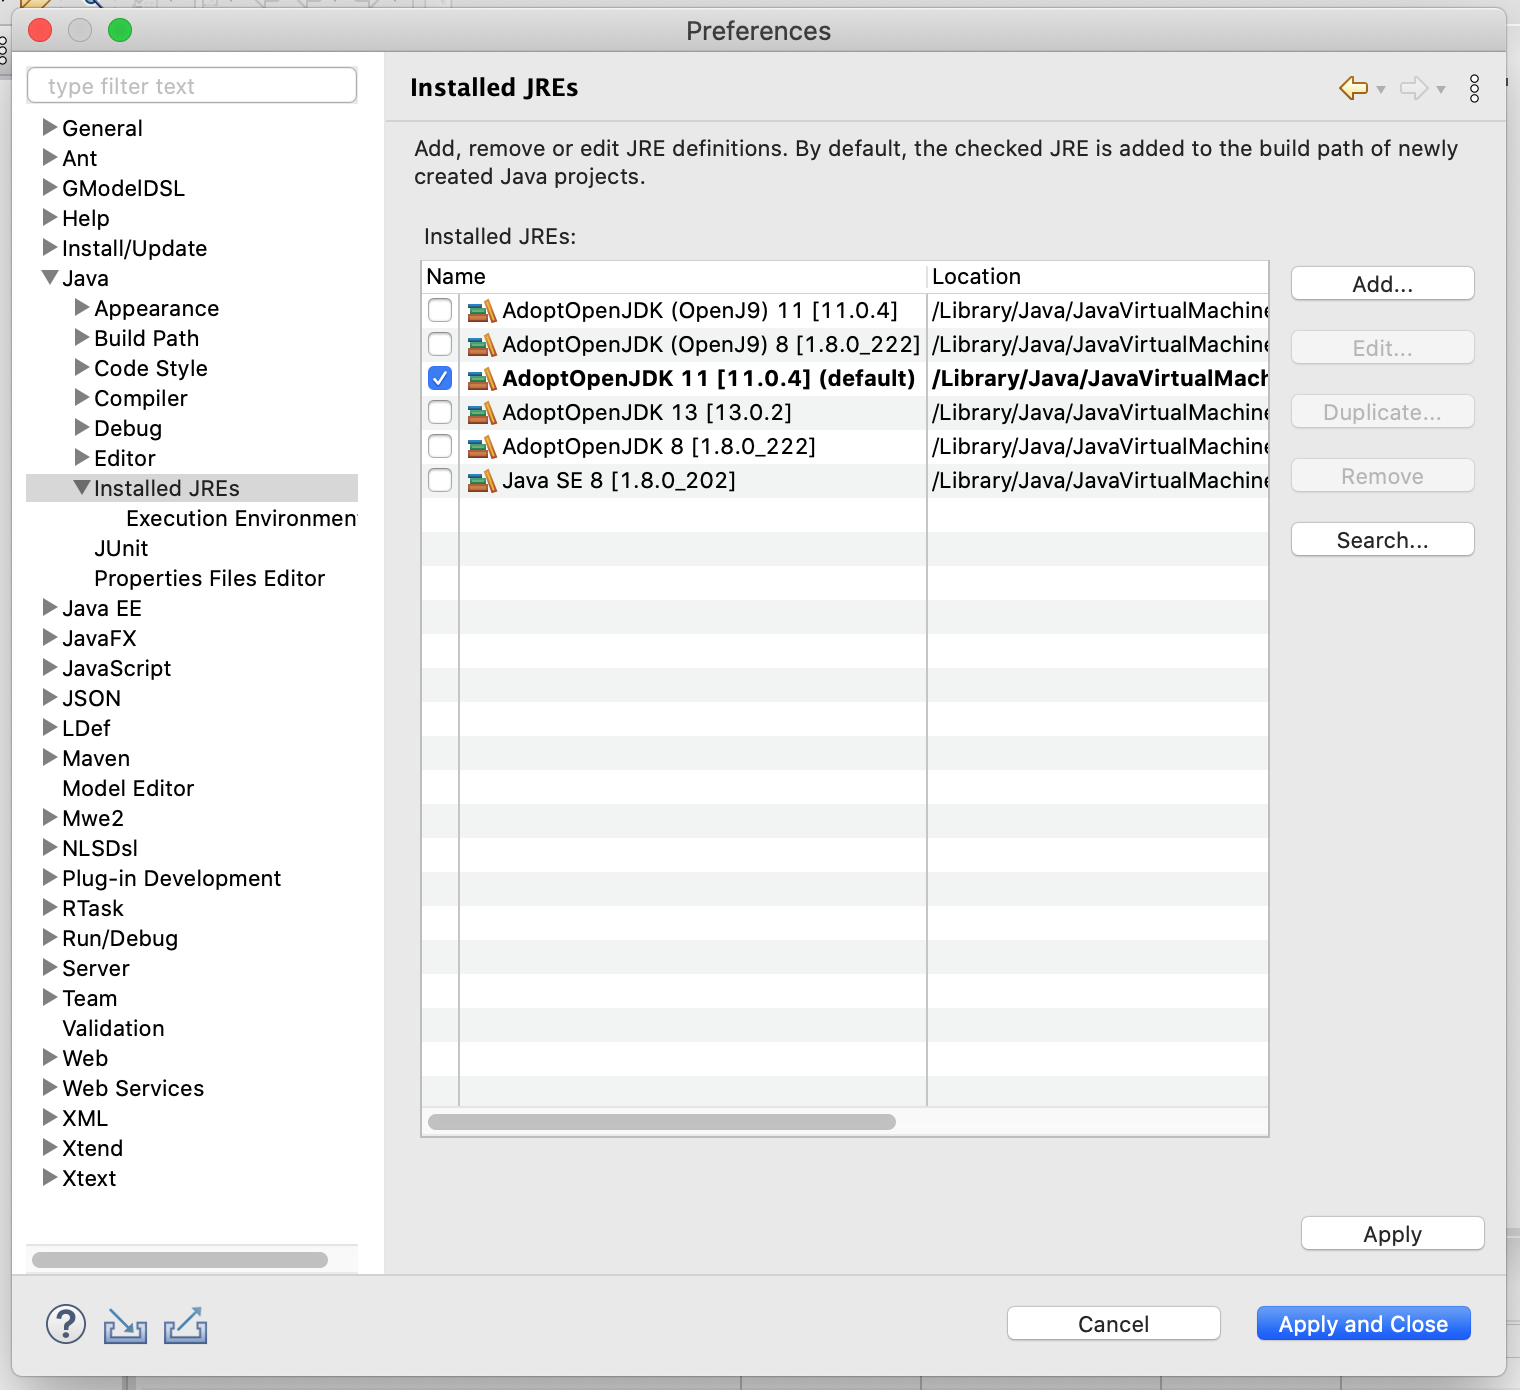 Make sure AdoptJDK-11 is used for the Java-SE-11 EE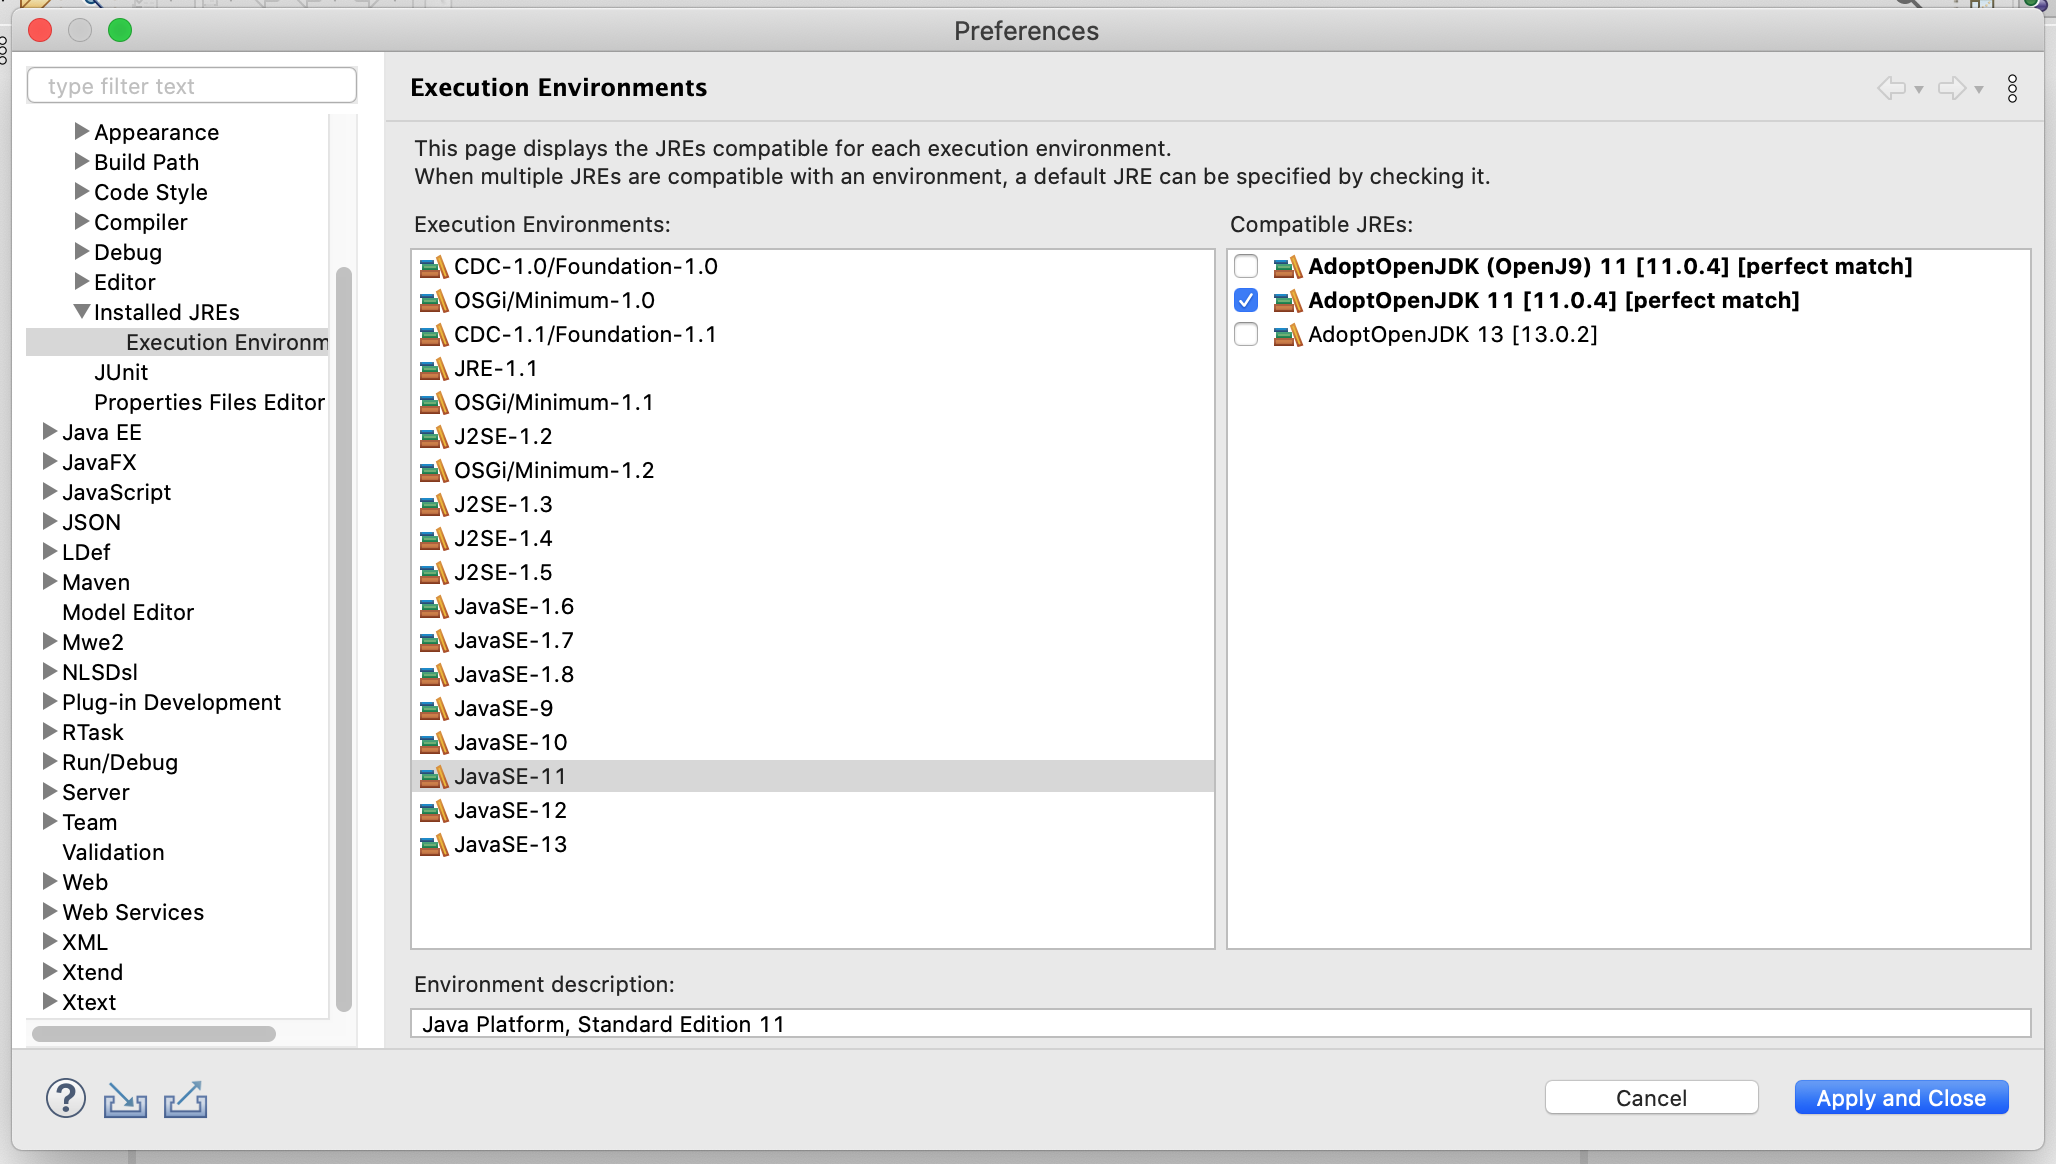
e(fx)clipse Settings
Open the JavaFX-Preference Page and point it to your JavaFX-11-SDK 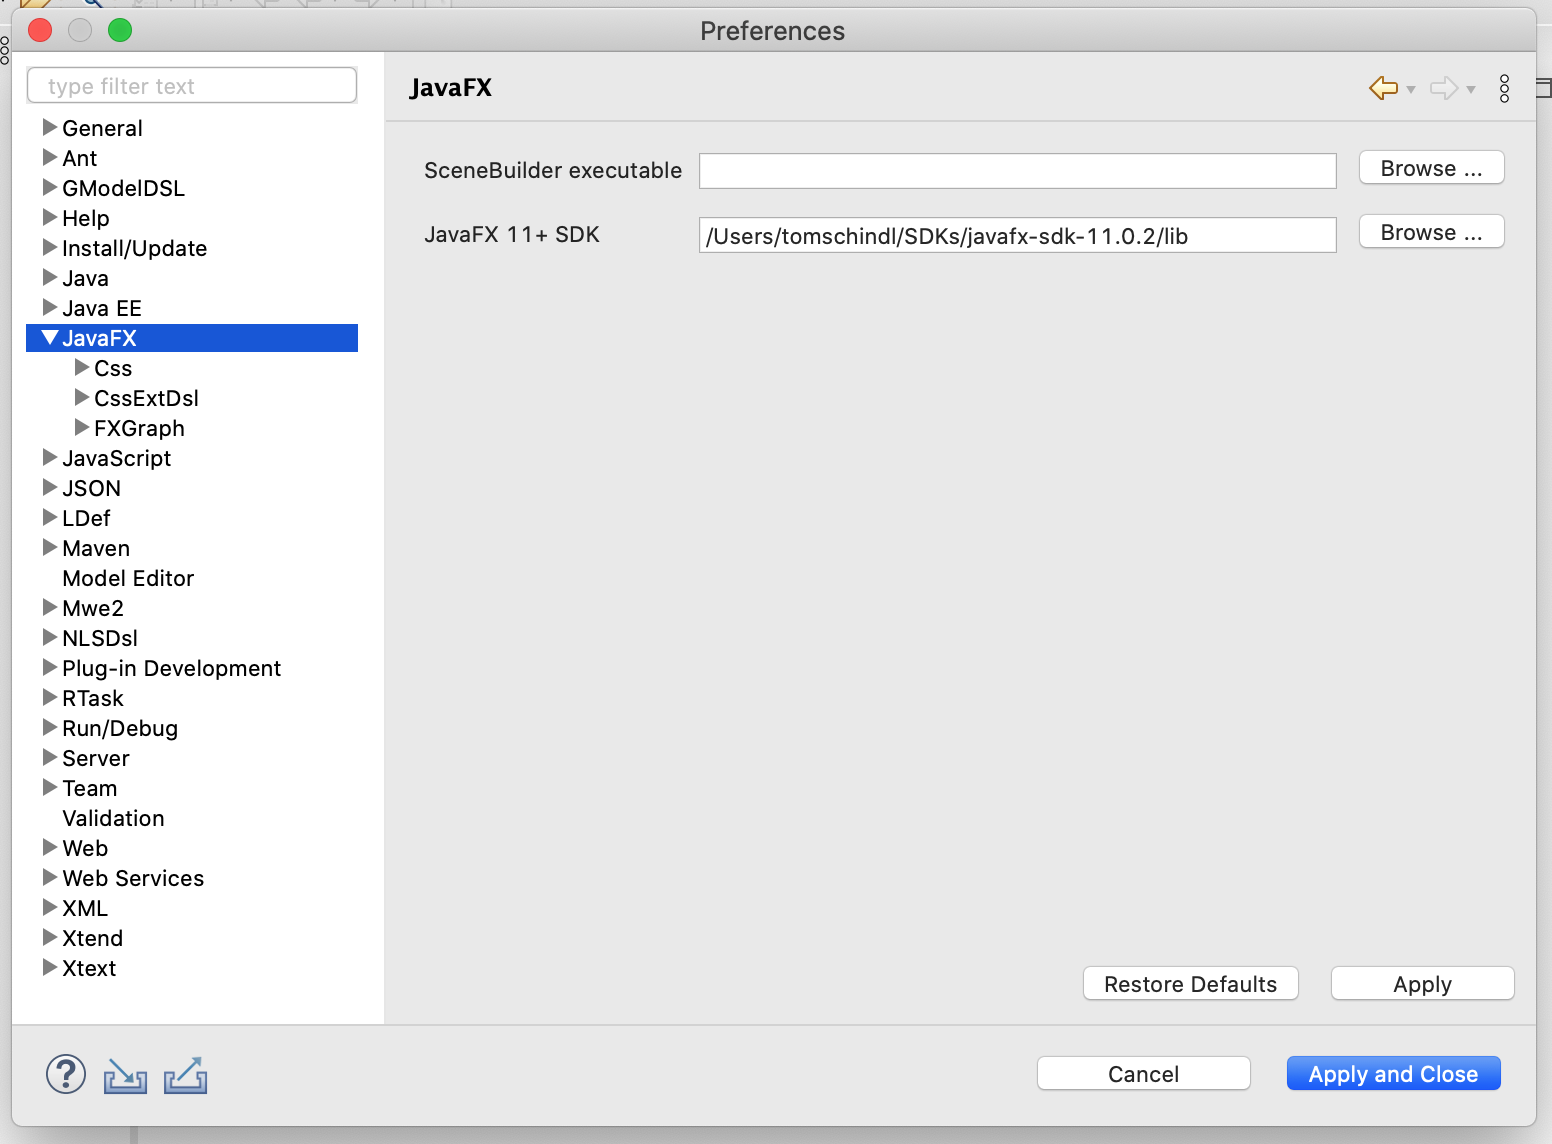 This step is required because JavaFX is not part of AdoptJDK-11 and hence Eclipse won't find the libraries and your code won't compile inside the IDE (we'll revisit this topic below once more)
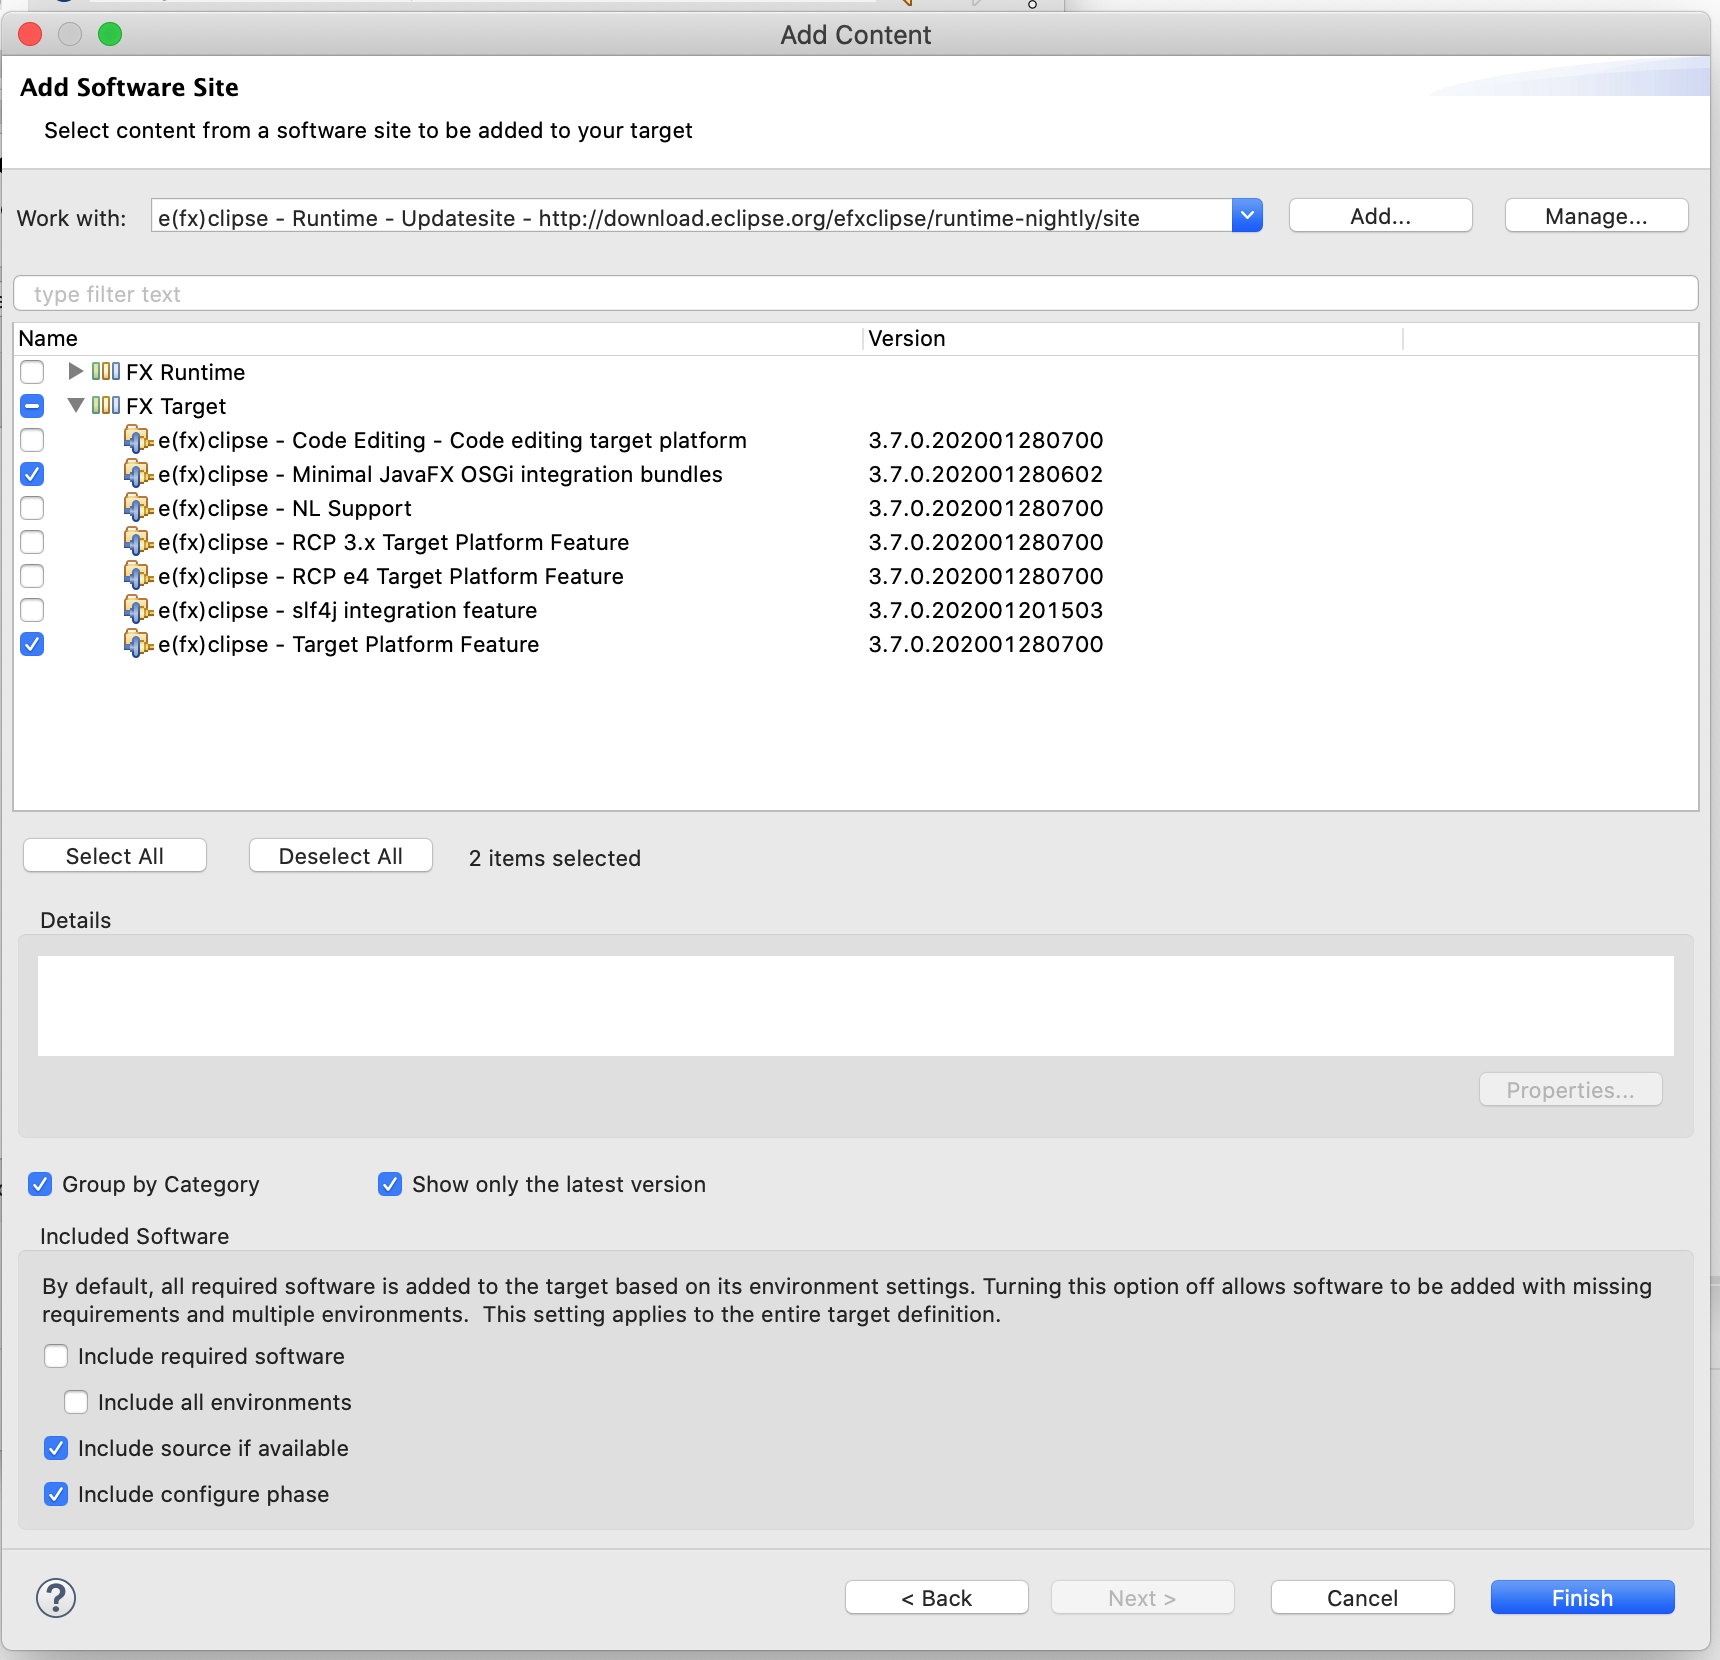
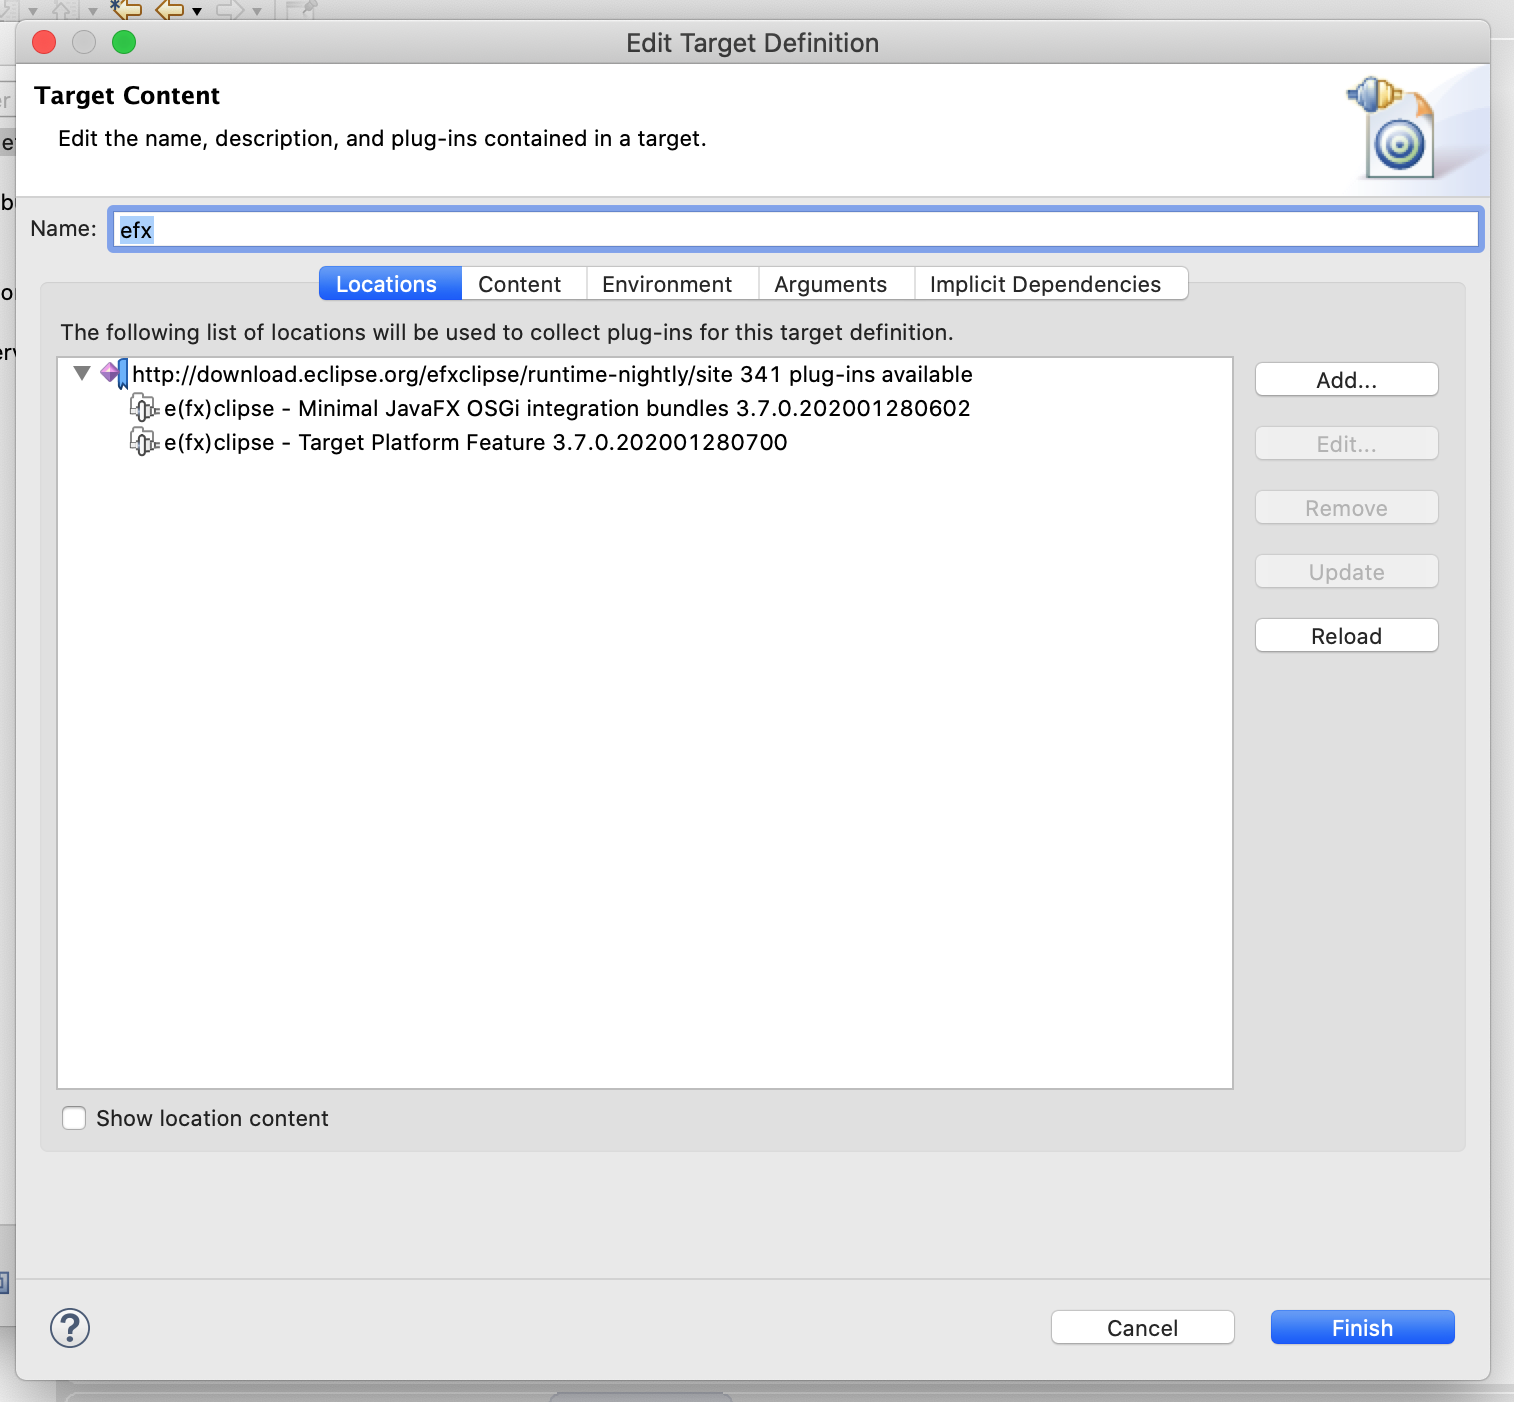
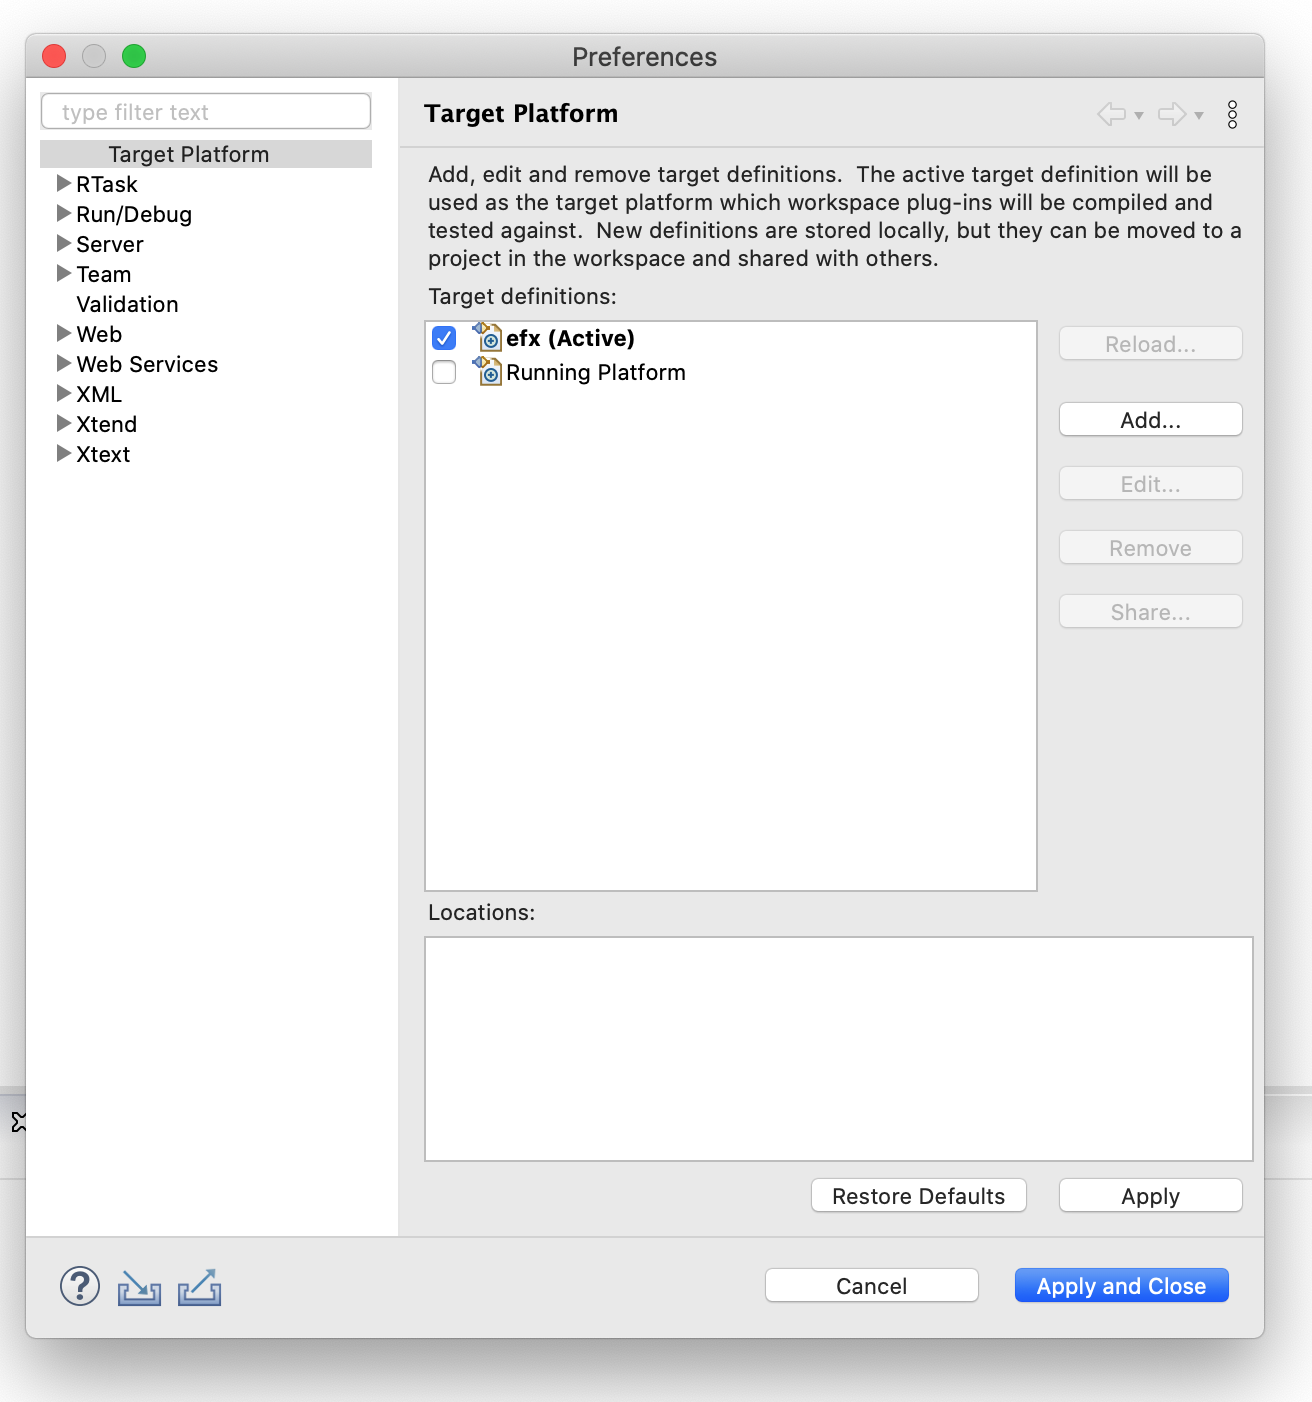
Setup a target platform
Create your project
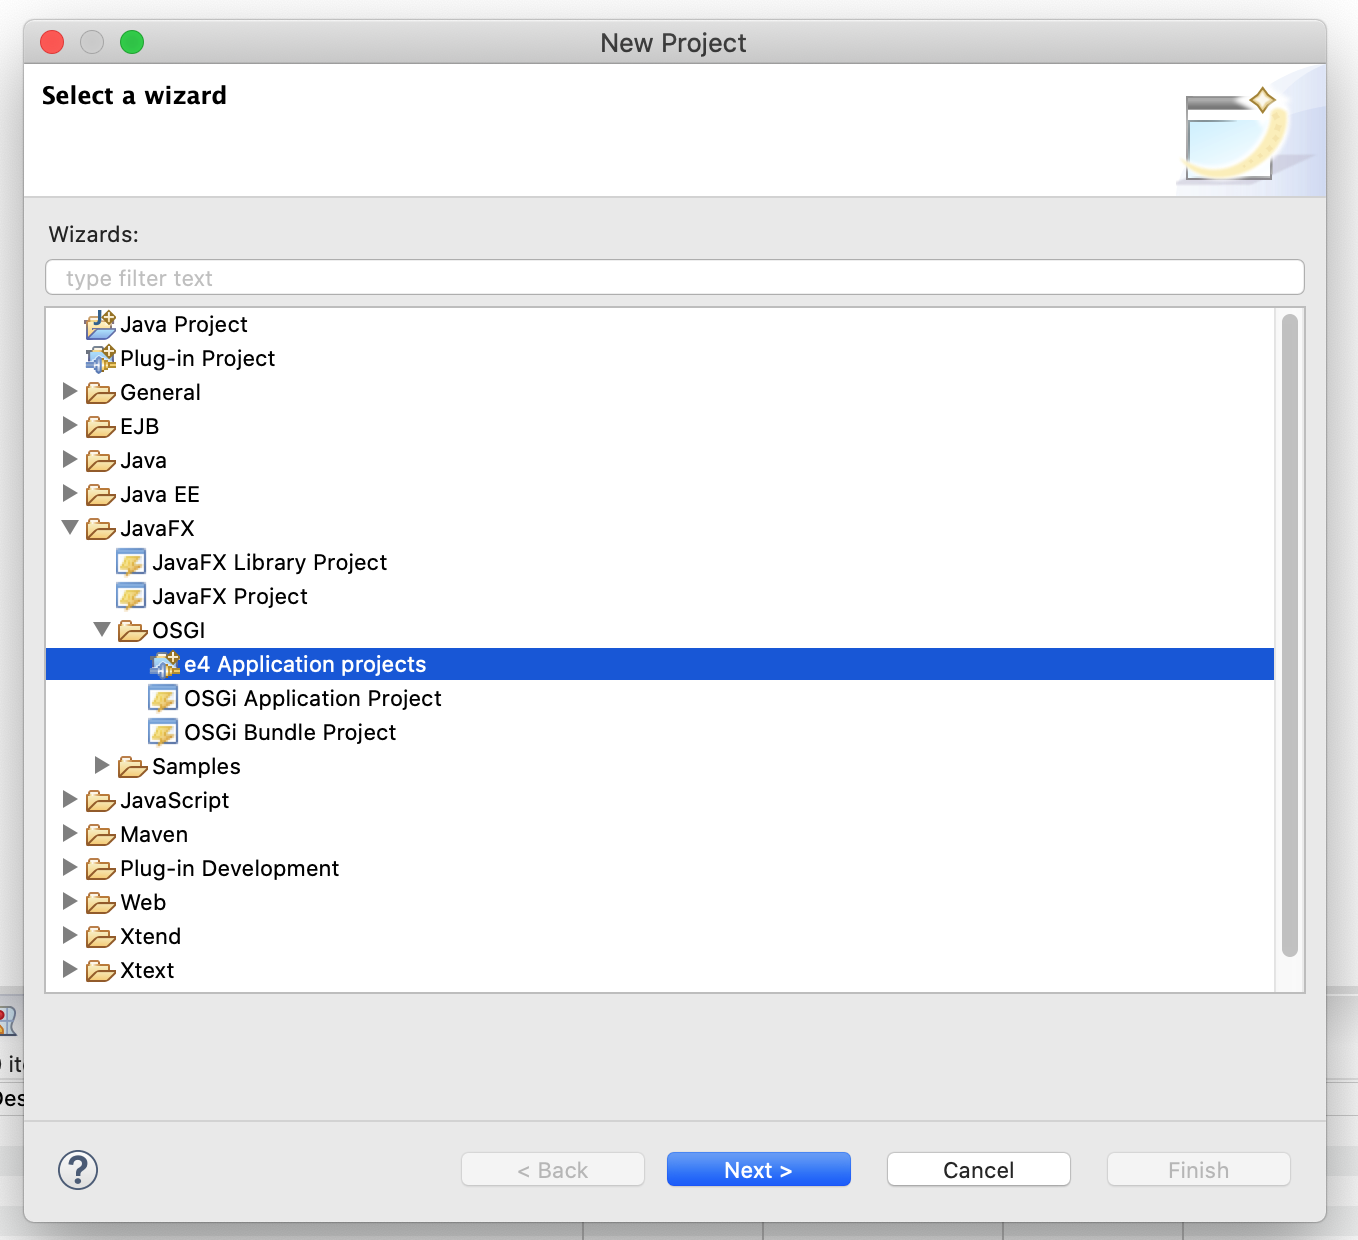
Bootstrap your project
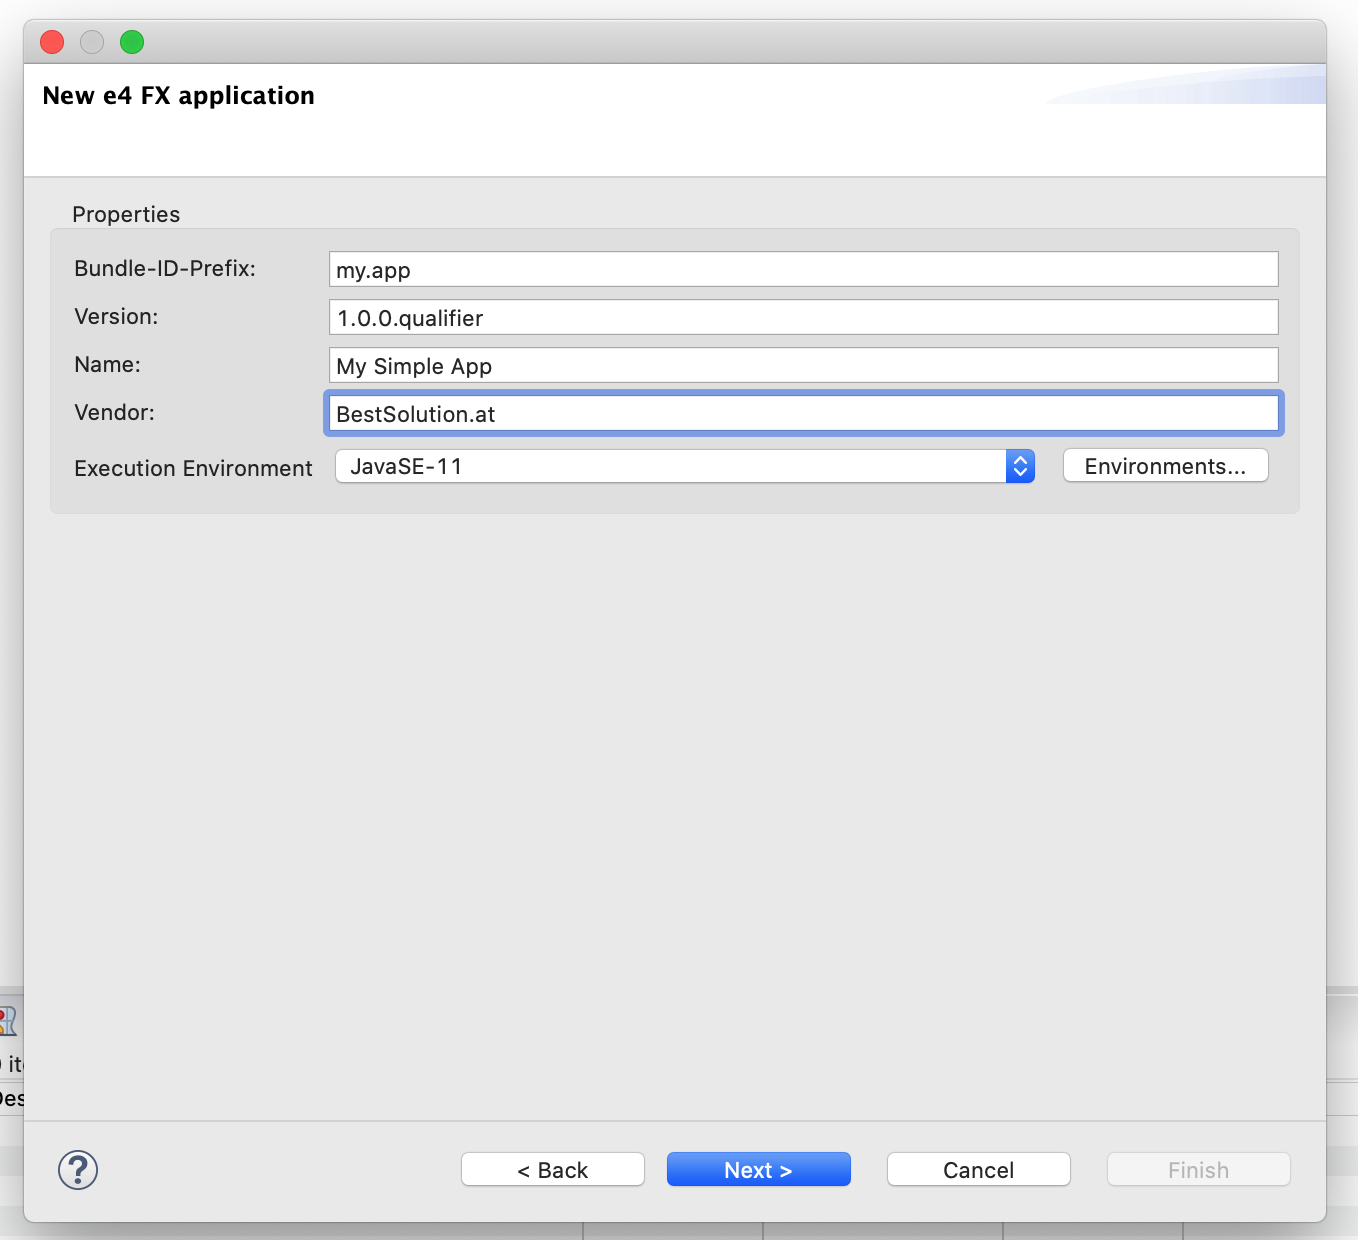
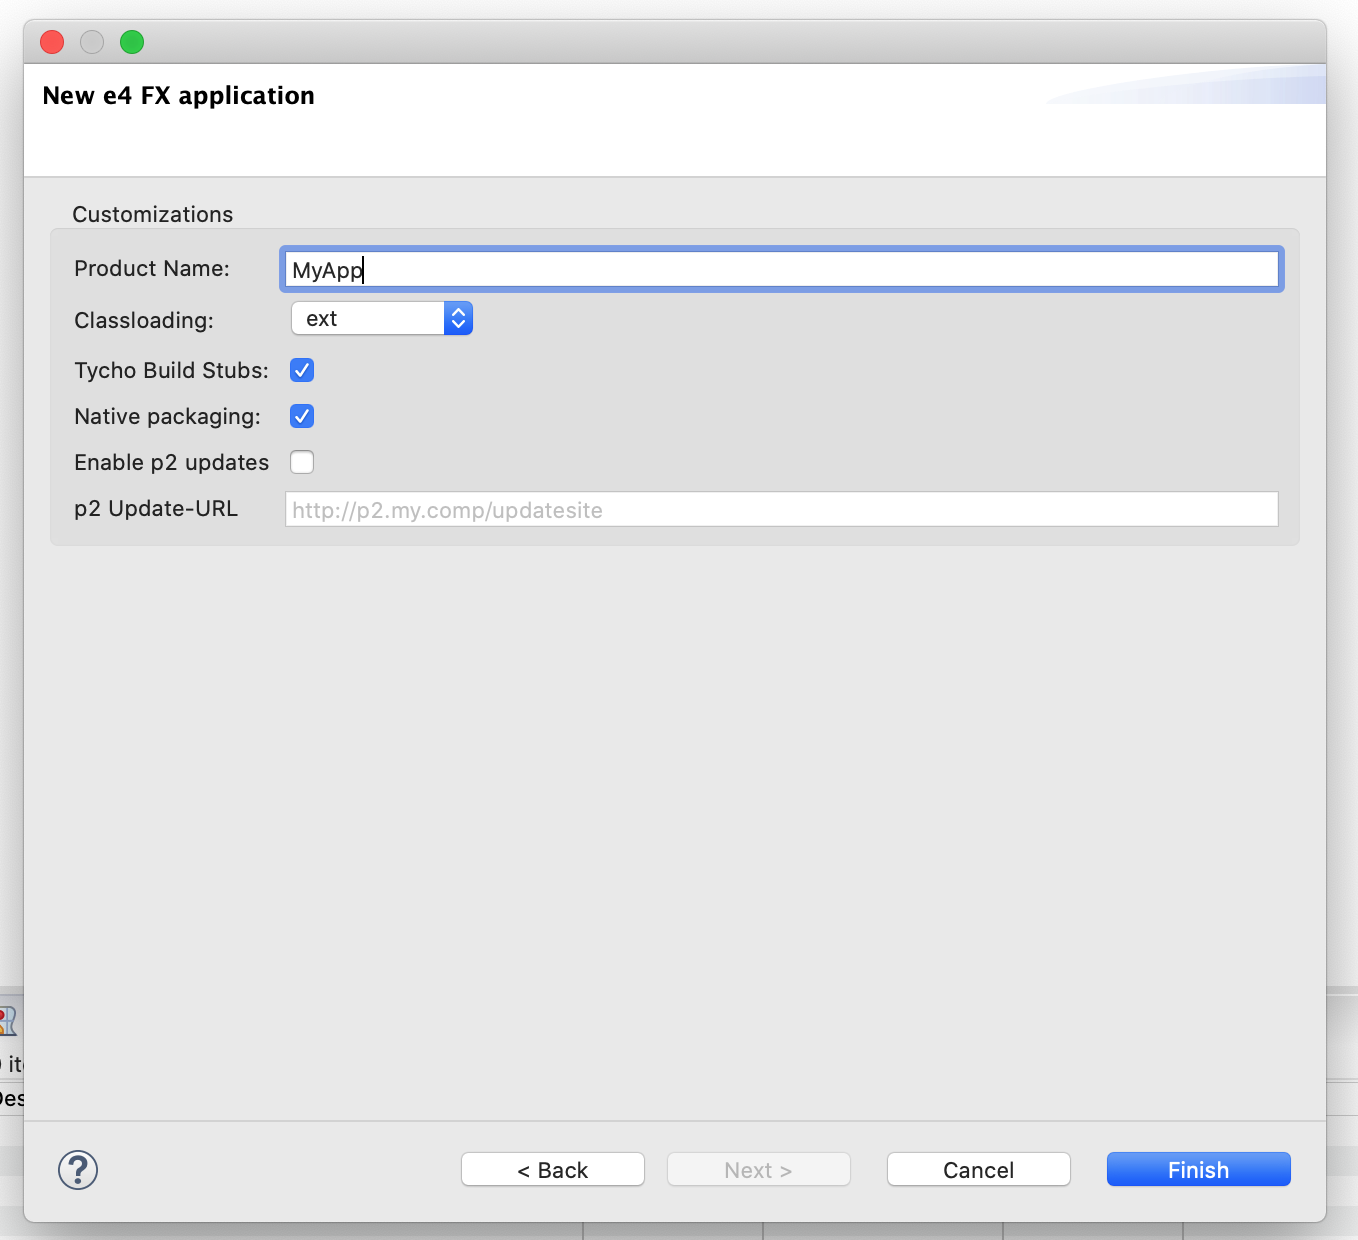
Check your project setup
Check if Eclipse correctly recognized the javafx-library and magically added them to your plug-in dependendencies 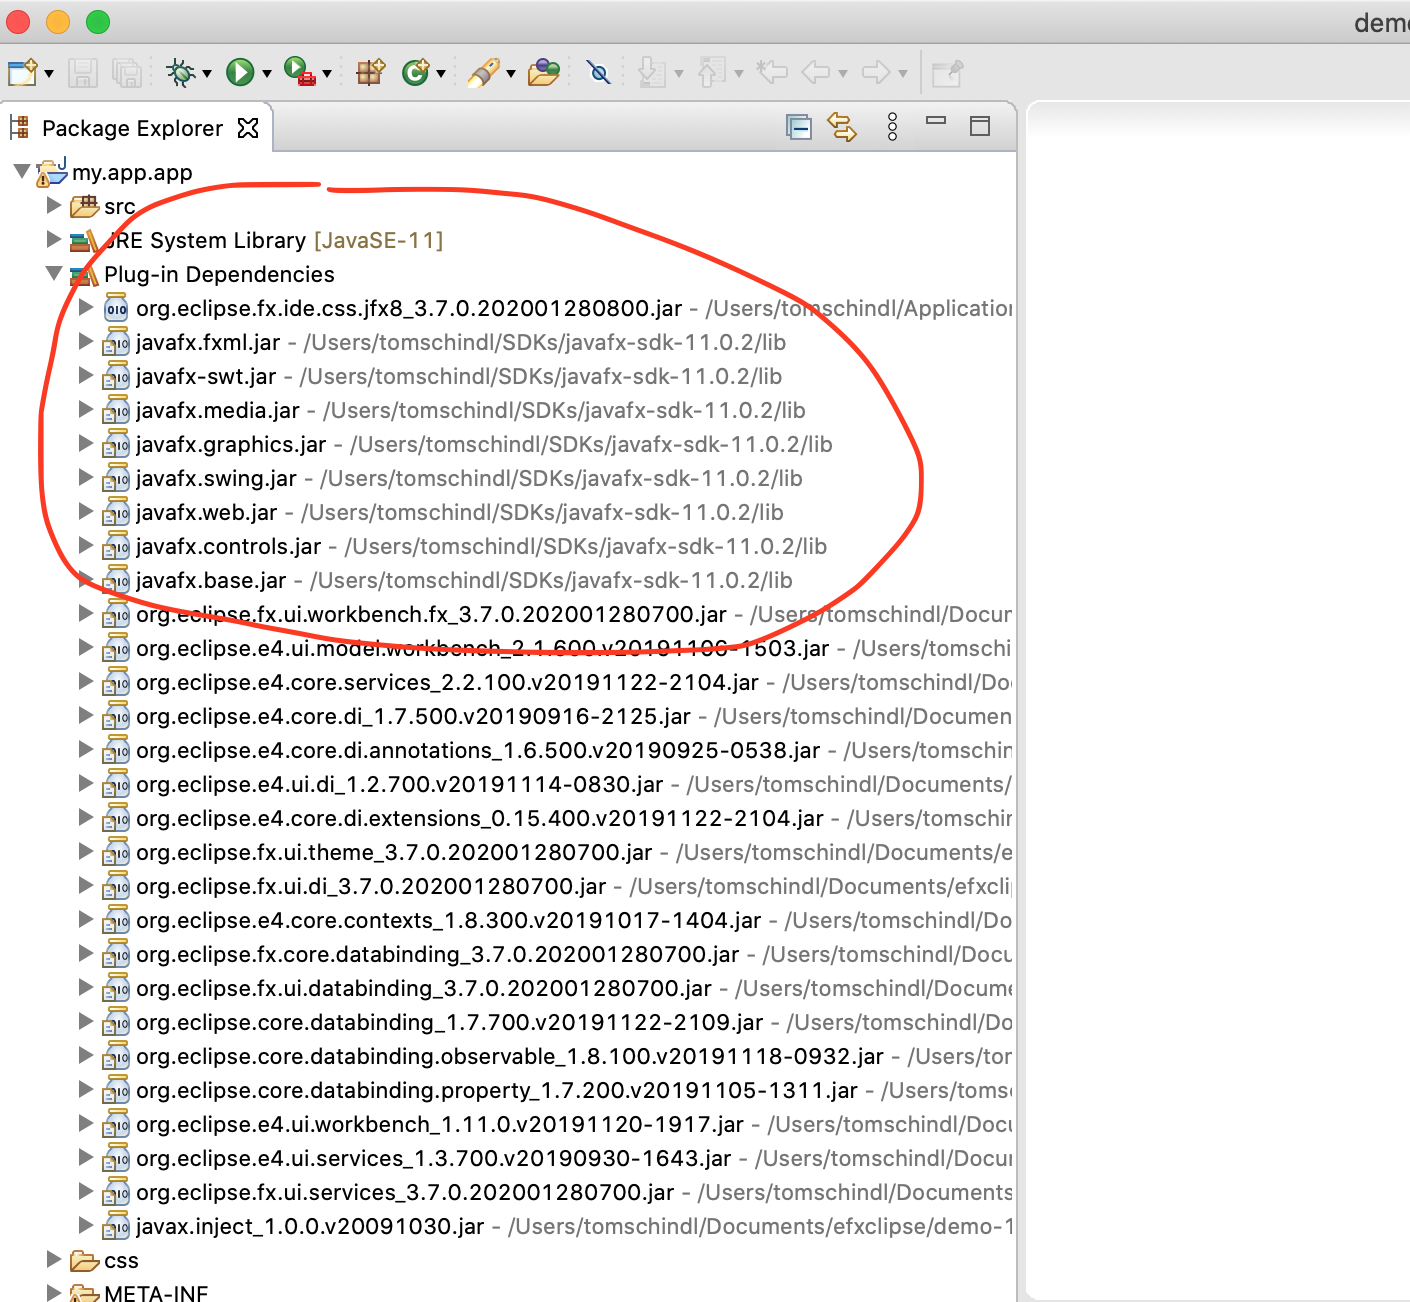
Implement the UI
Add javax.annotation to your MANIFEST.MF
Before you can write the Java-Code for your UI you need to add javax.annotation-package to your bundle (this used to ship with Java-8 has been removed since then) 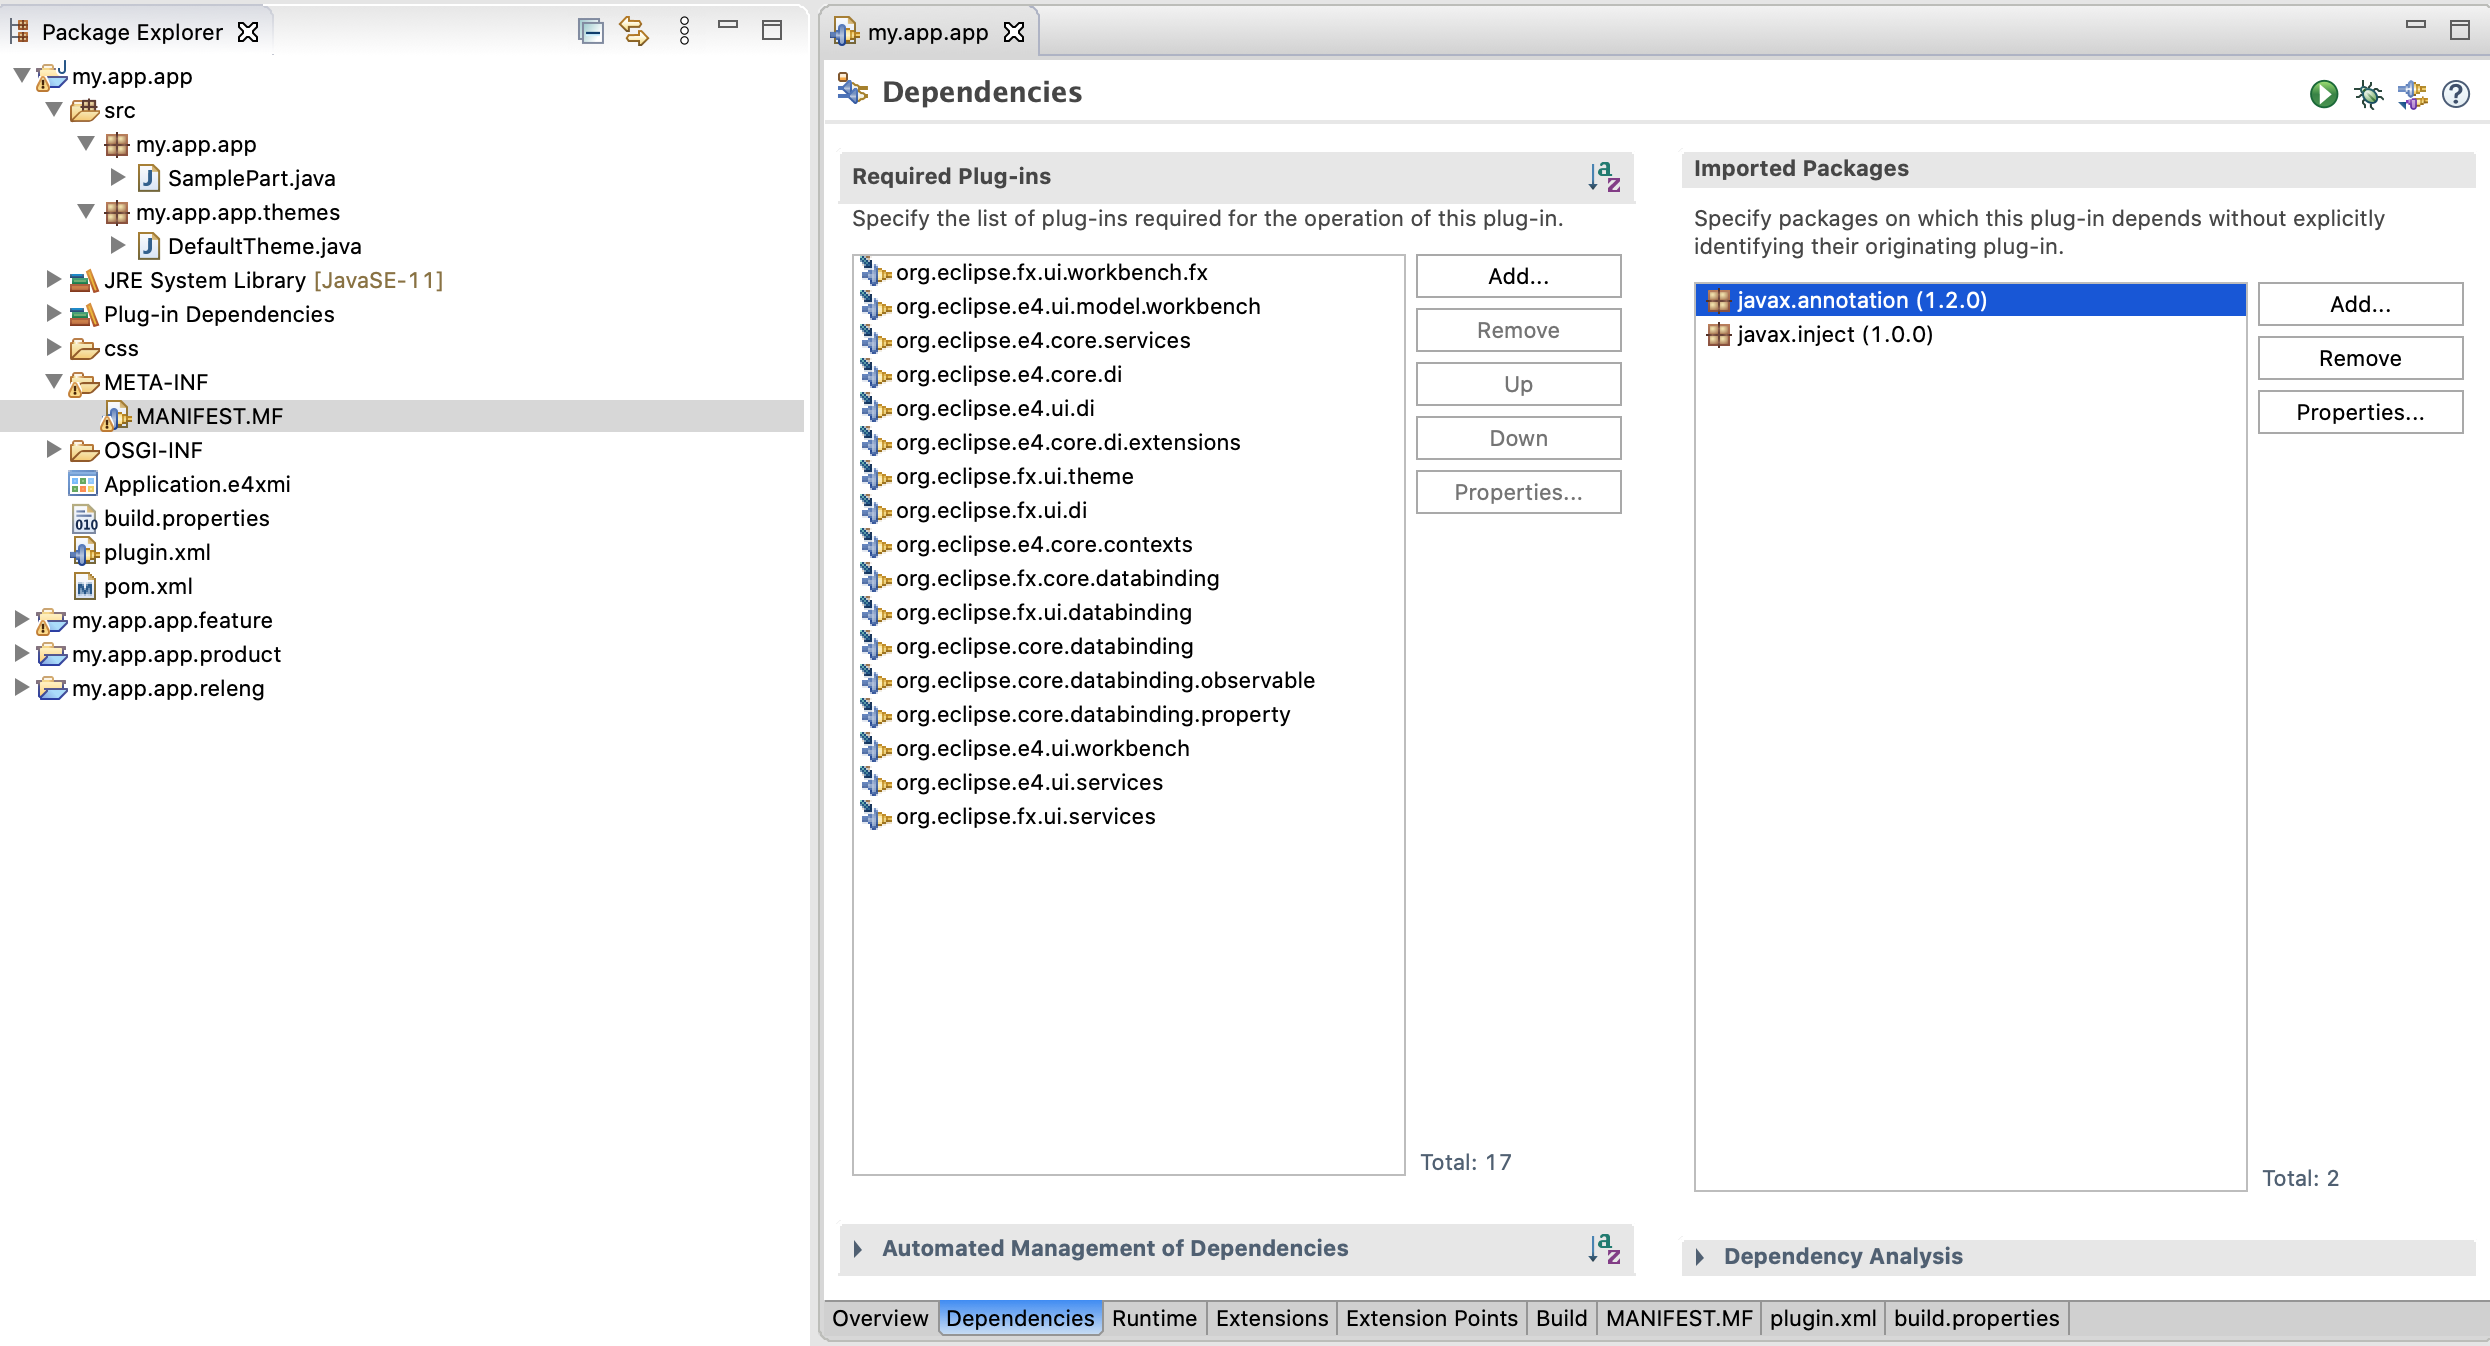
Create a Java-Class
package my.app.app;

import javax.annotation.PostConstruct;

import javafx.scene.control.Label;
import javafx.scene.layout.BorderPane;

public class SamplePart {
  @PostConstruct
  void init(BorderPane root) {
    root.setCenter(
      new Label(System.getProperty("javafx.version"))
    );
  }
}
Adapt your e4xmi
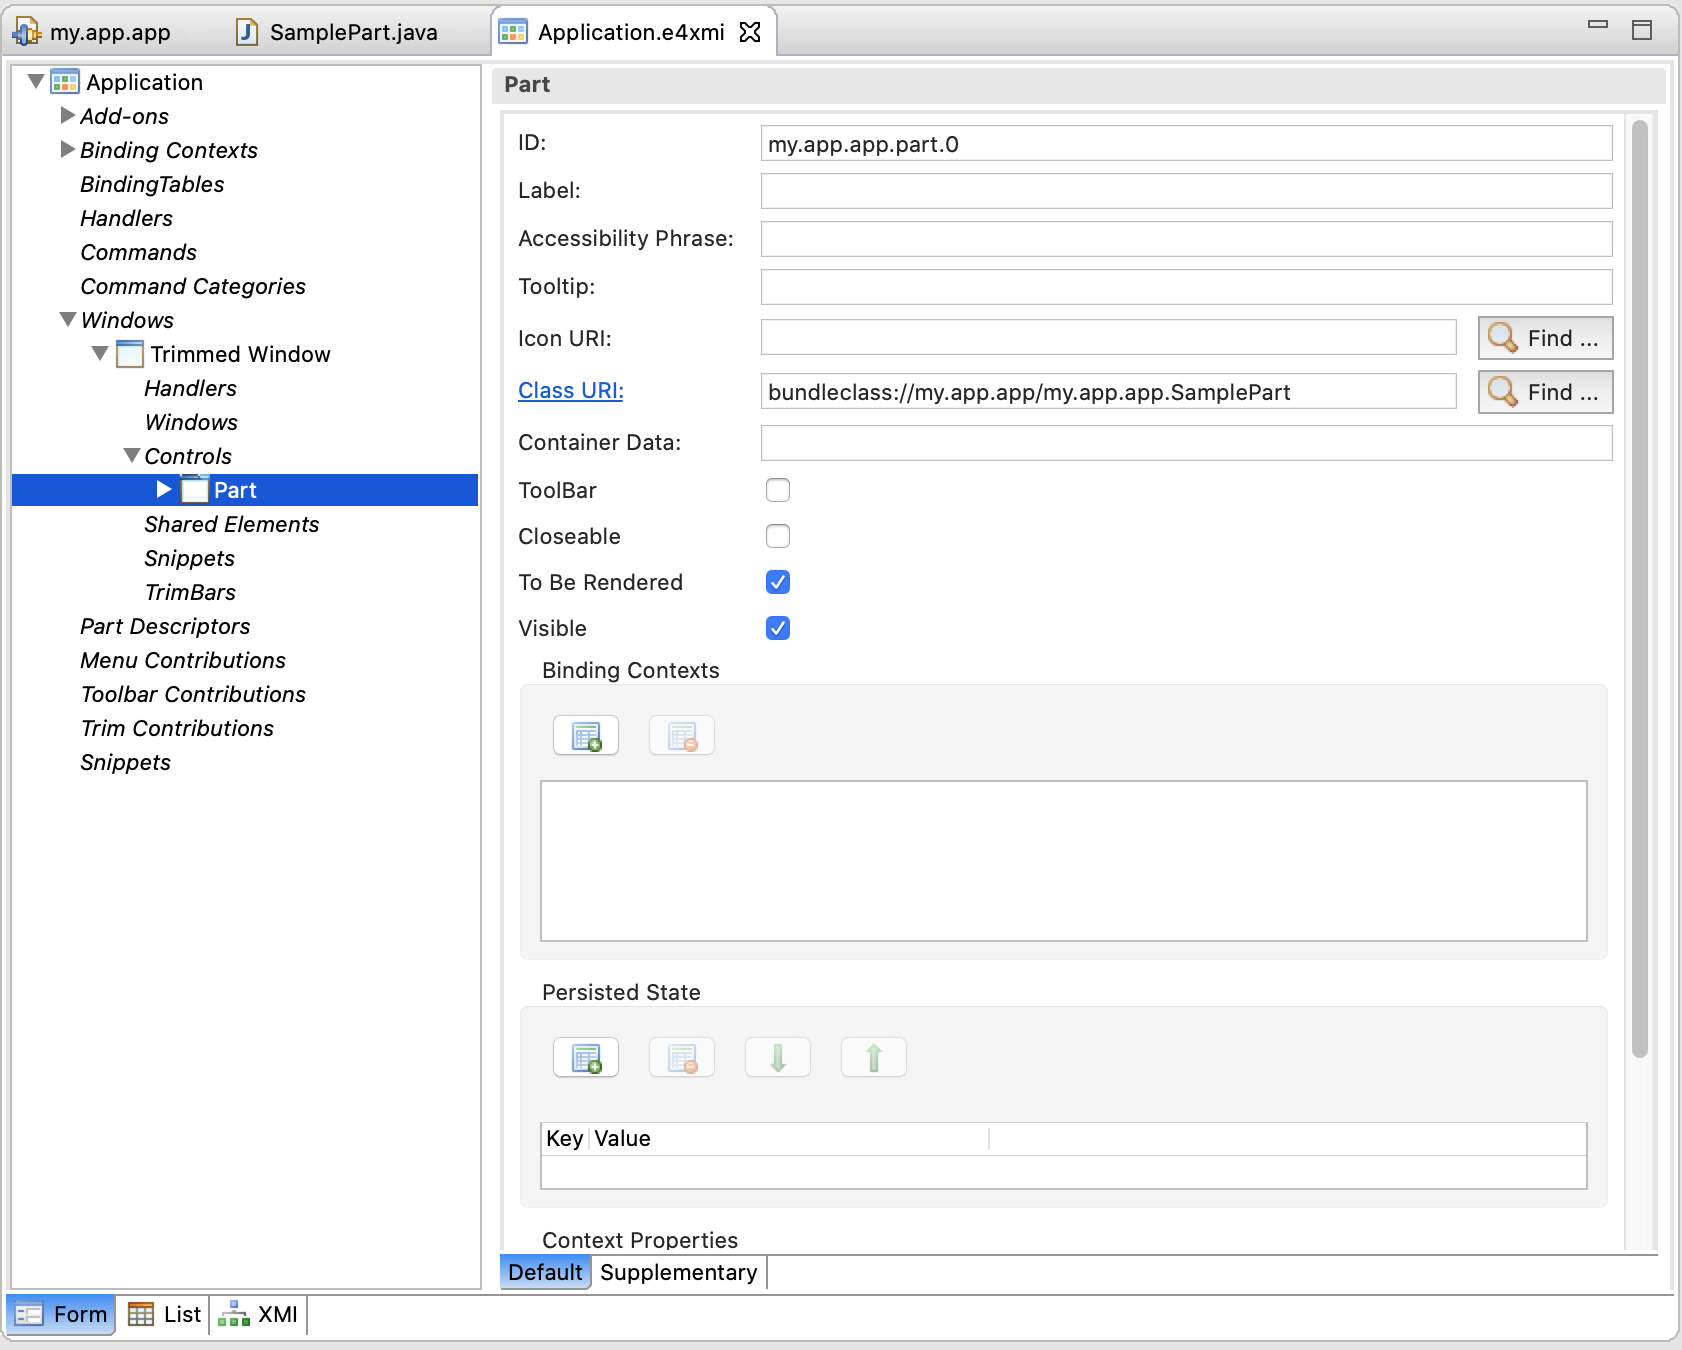
Running your application
While everything happily compiles running the application would fail because in the initial steps we only satisfied the Eclipse compiler by magically injecting the JavaFX-Libraries in your Plug-in-Dependency (see above). To run the application we need to decide how we'd like to ship JavaFX:
- next to your application in a folder
- as part of your eclipse application inside the the plugins-directory
- you jlink yourself a JDK
We'll not take a look at the 3rd solution as part of this blog post!
Running with an external folder
Open the generated launch configuration and append -Defxclipse.java-modules.dir=PATH_TO_YOUR_JAVAFX_LIBS in the VM arguments-field 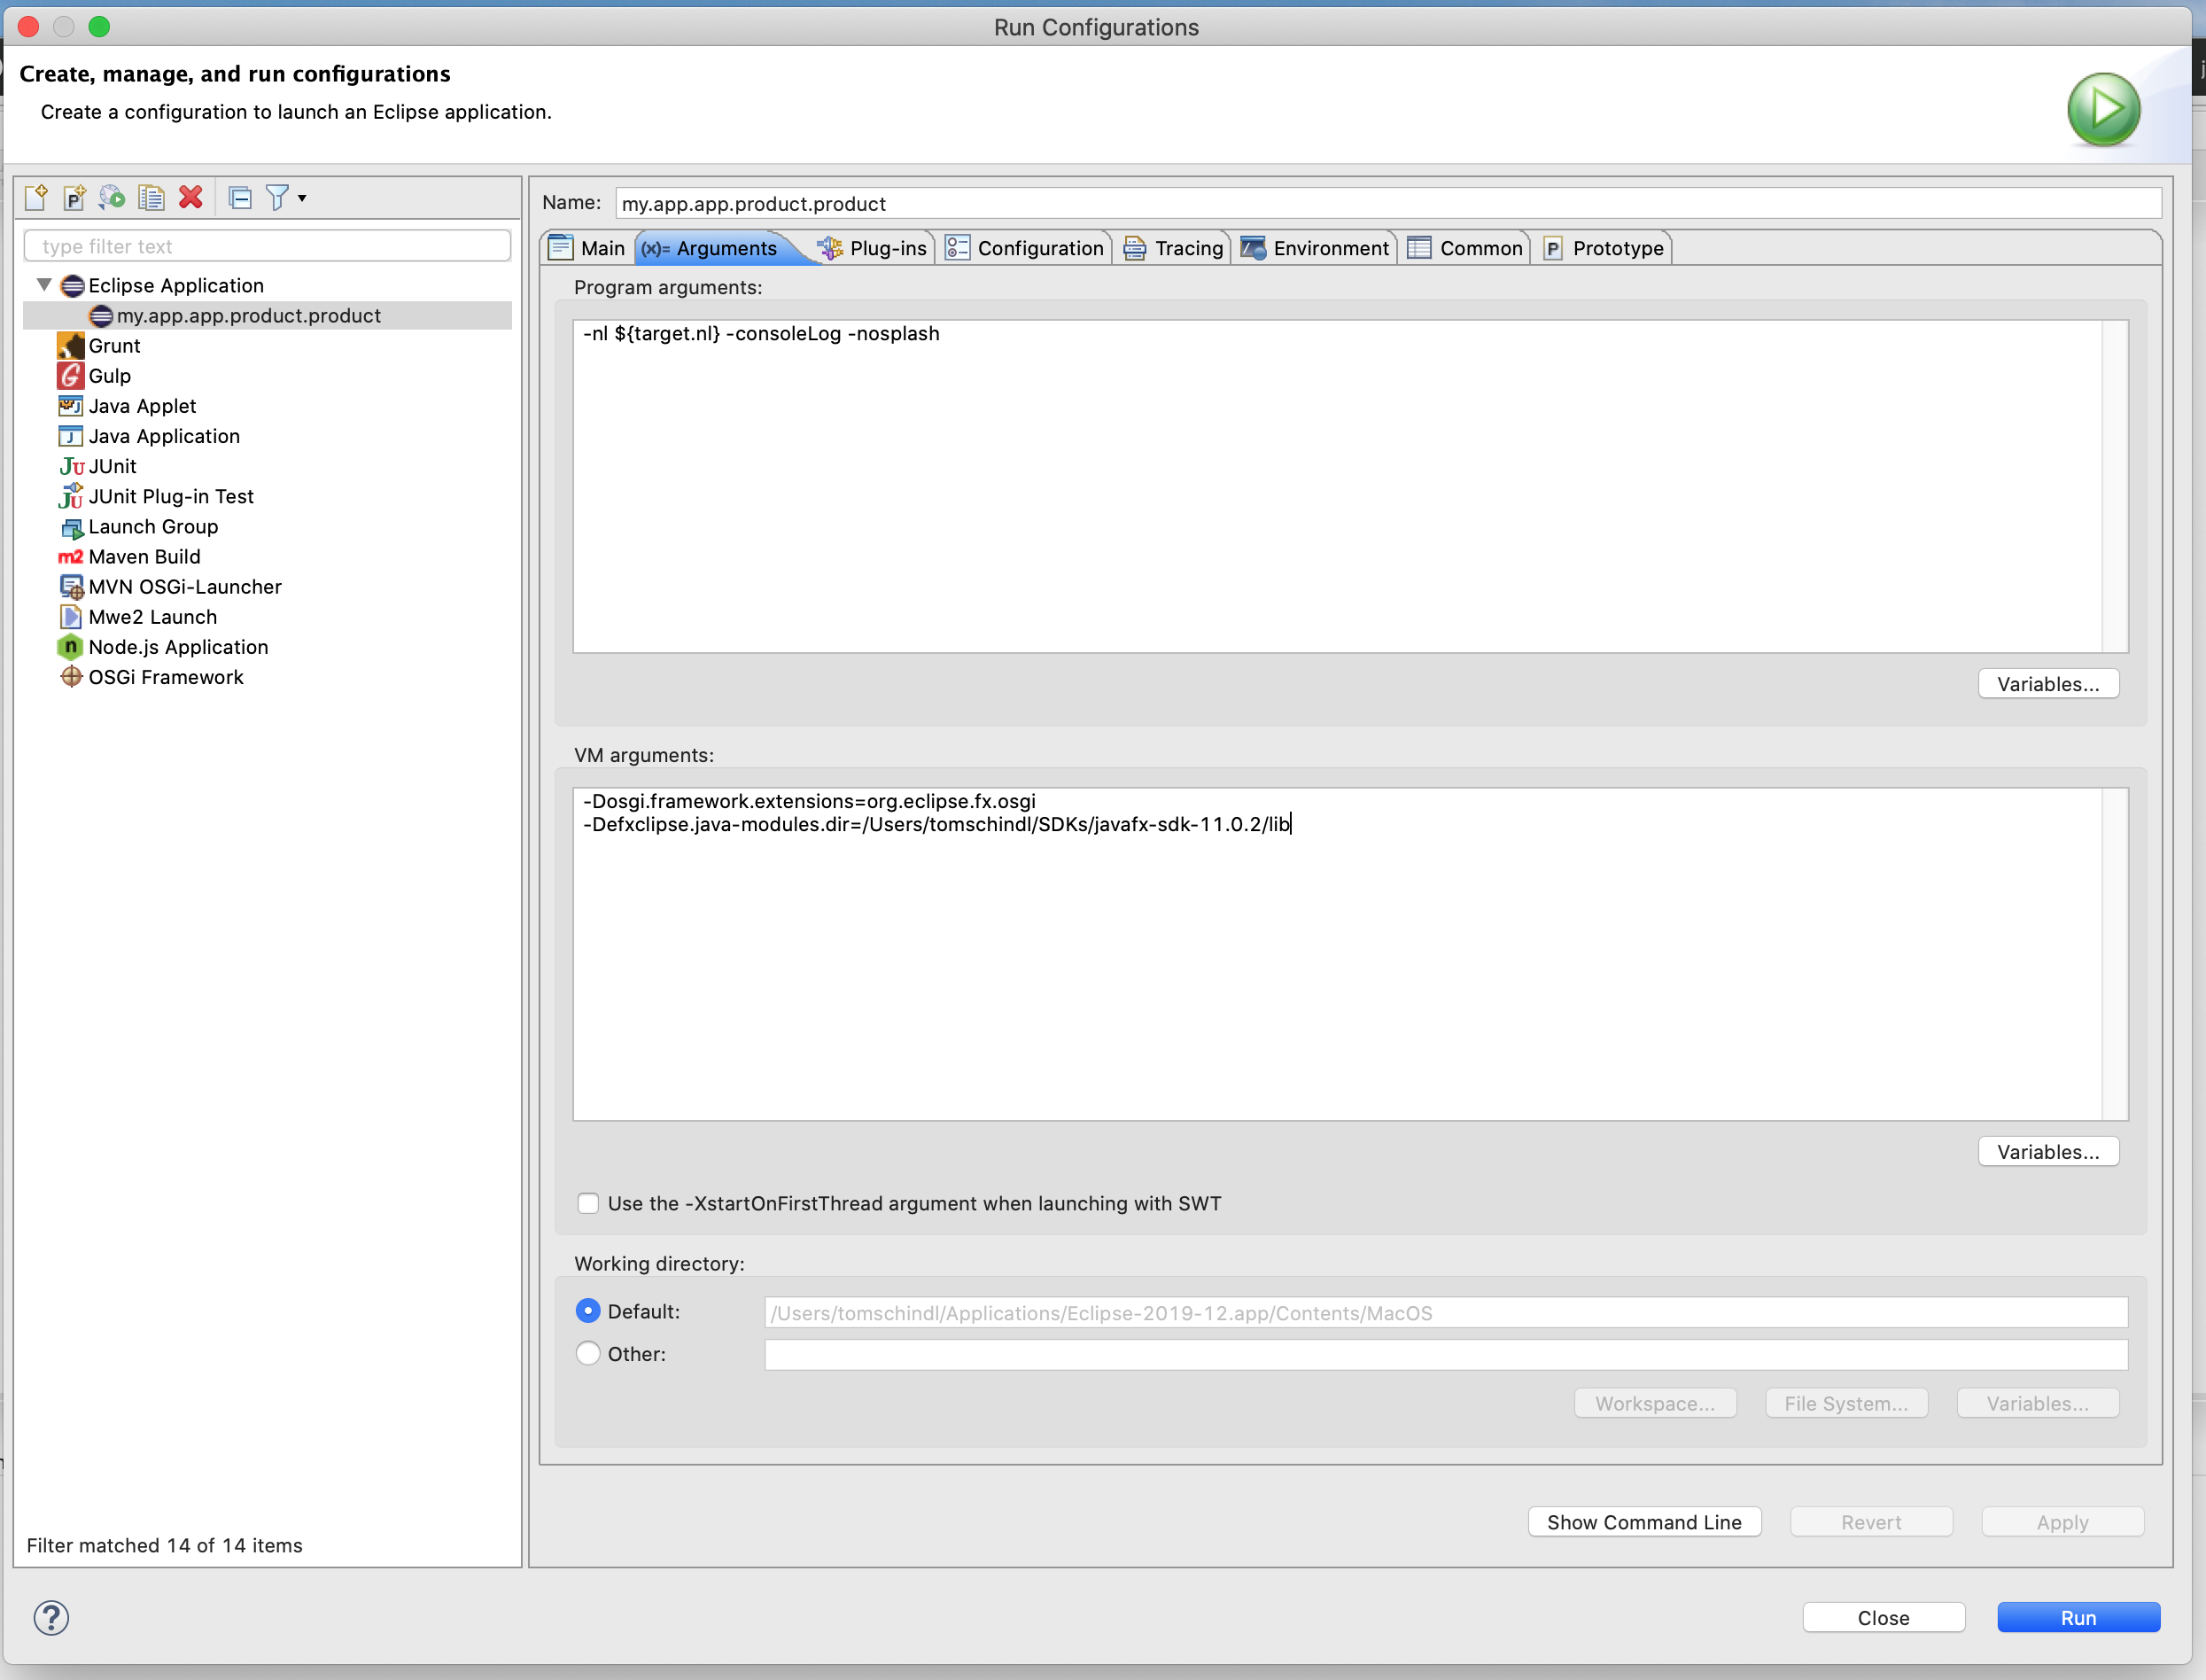
Running with bundled javafx-modules
We provide OSGi-Bundles who contain the original and unmodified JavaFX-Modules (note you can NOT use them are OSGi-Dependencies!) you can use them by adding downloads.efxclipse.bestsolution.at 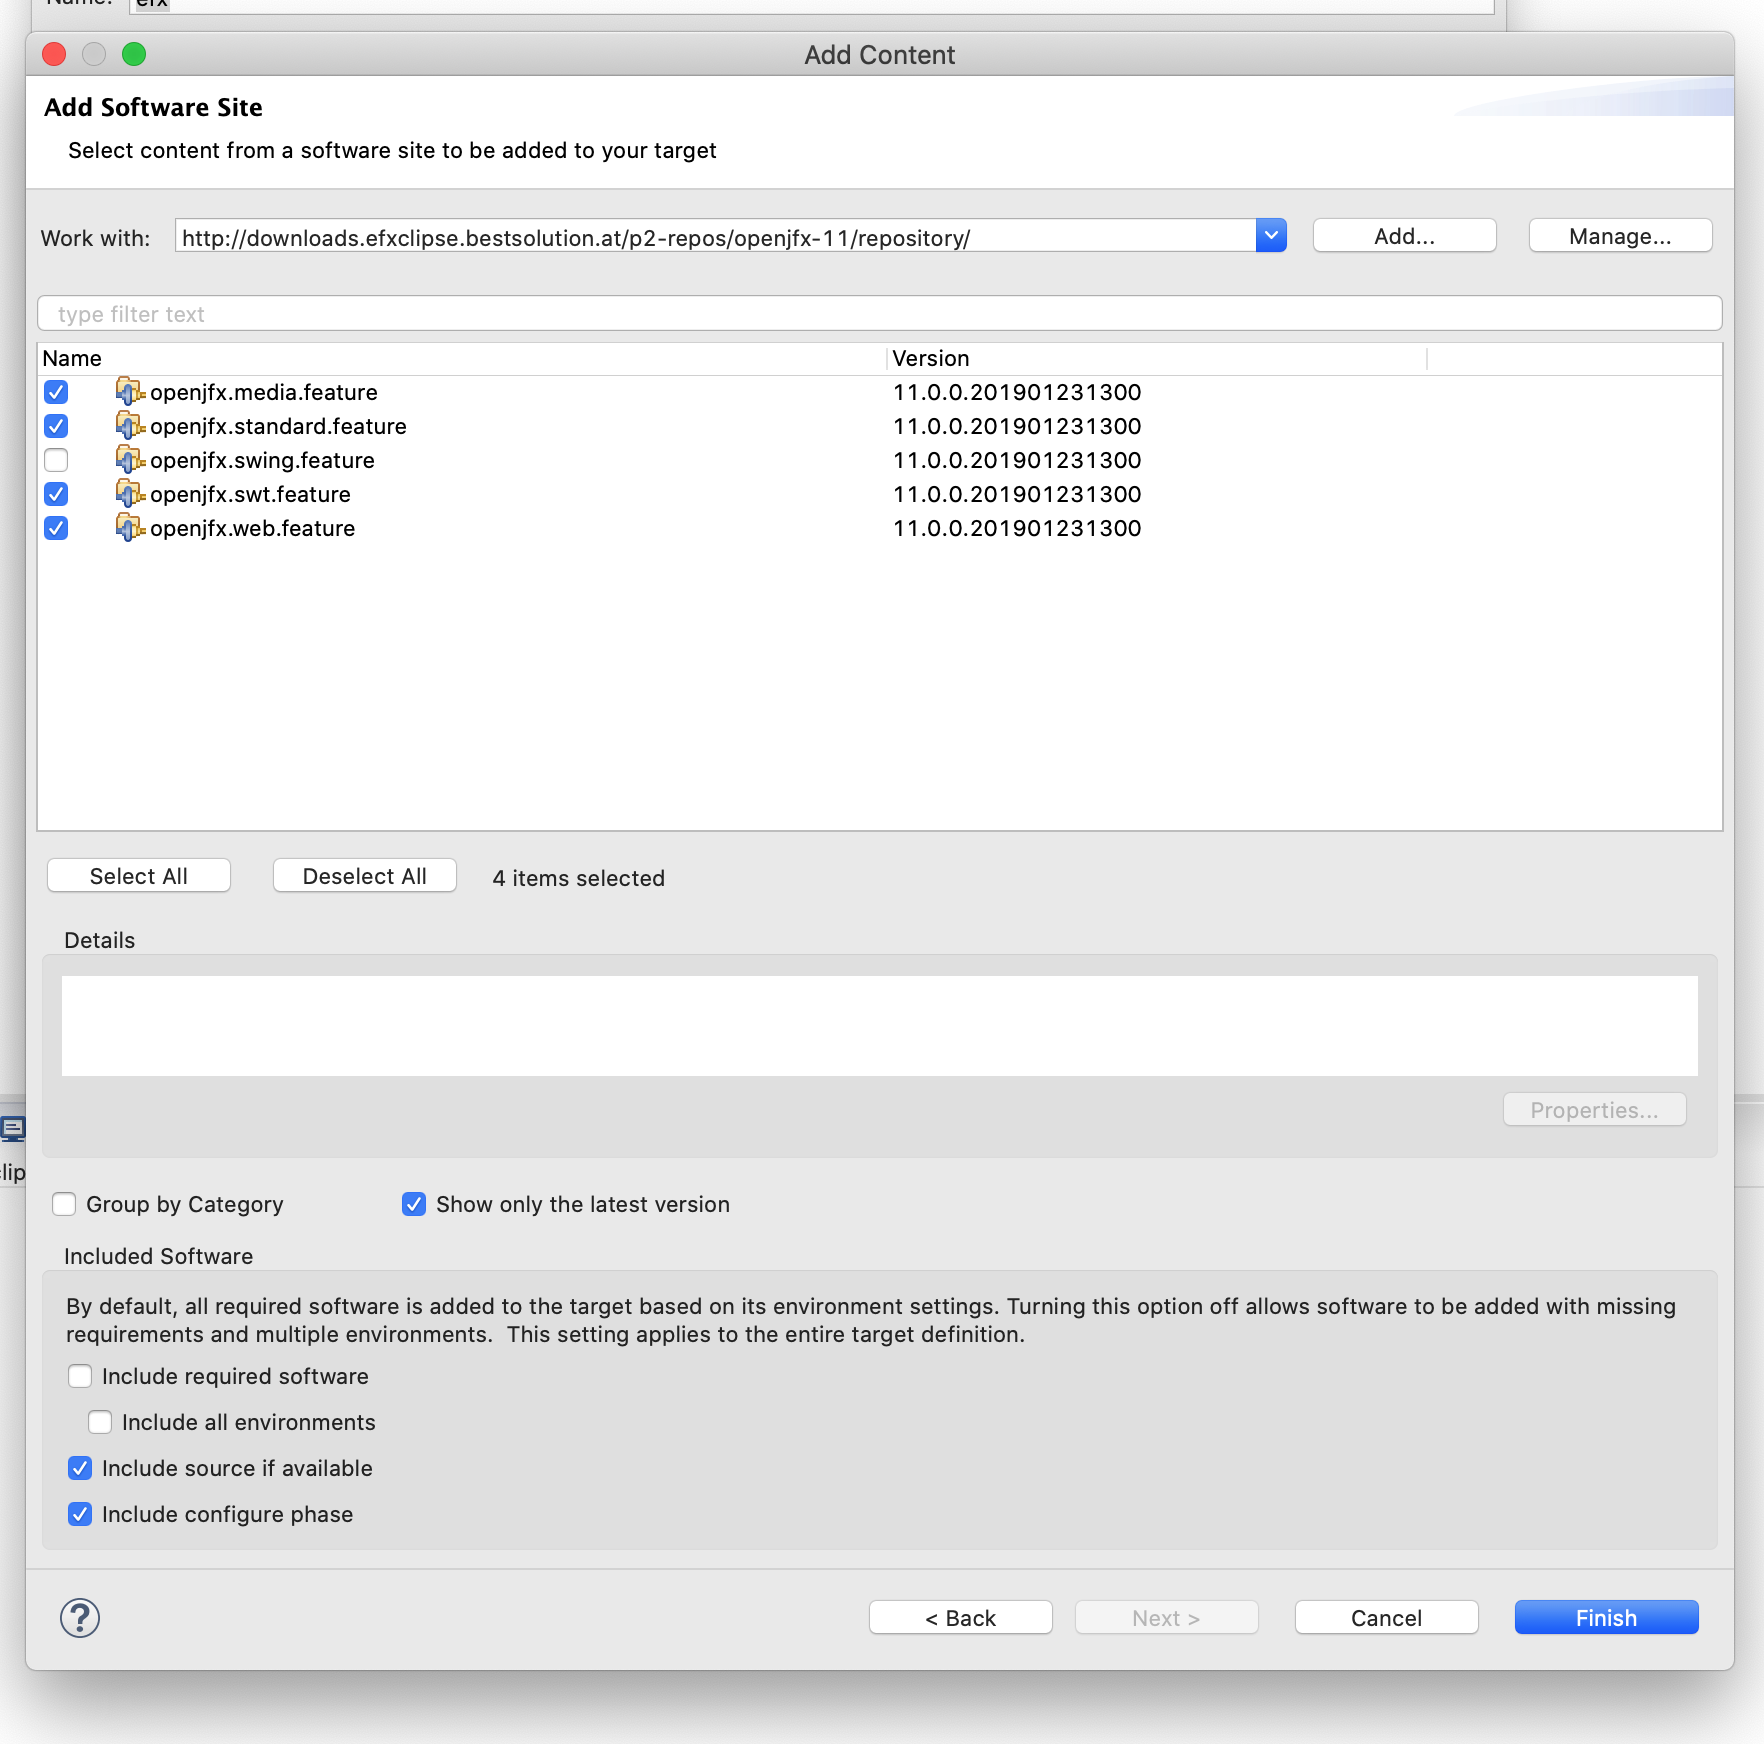
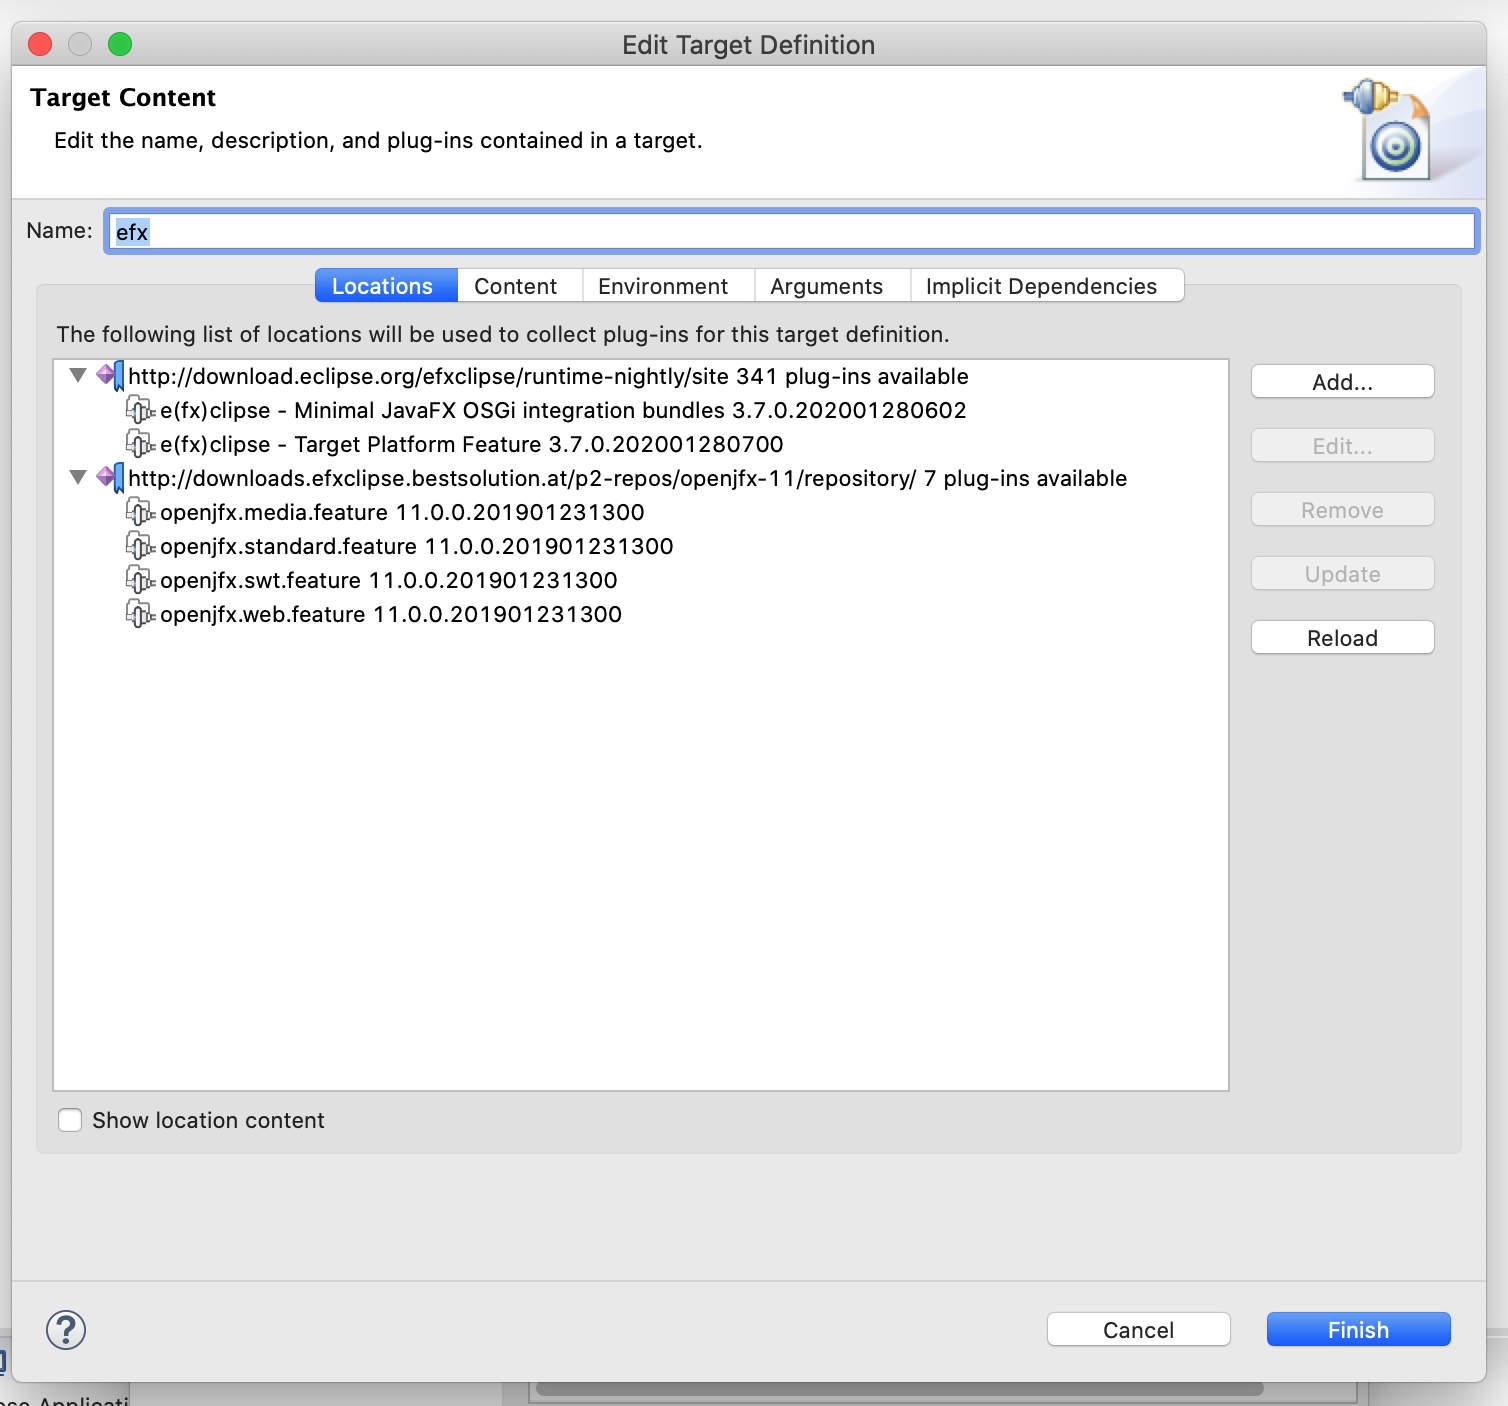 Add them to your launch configuration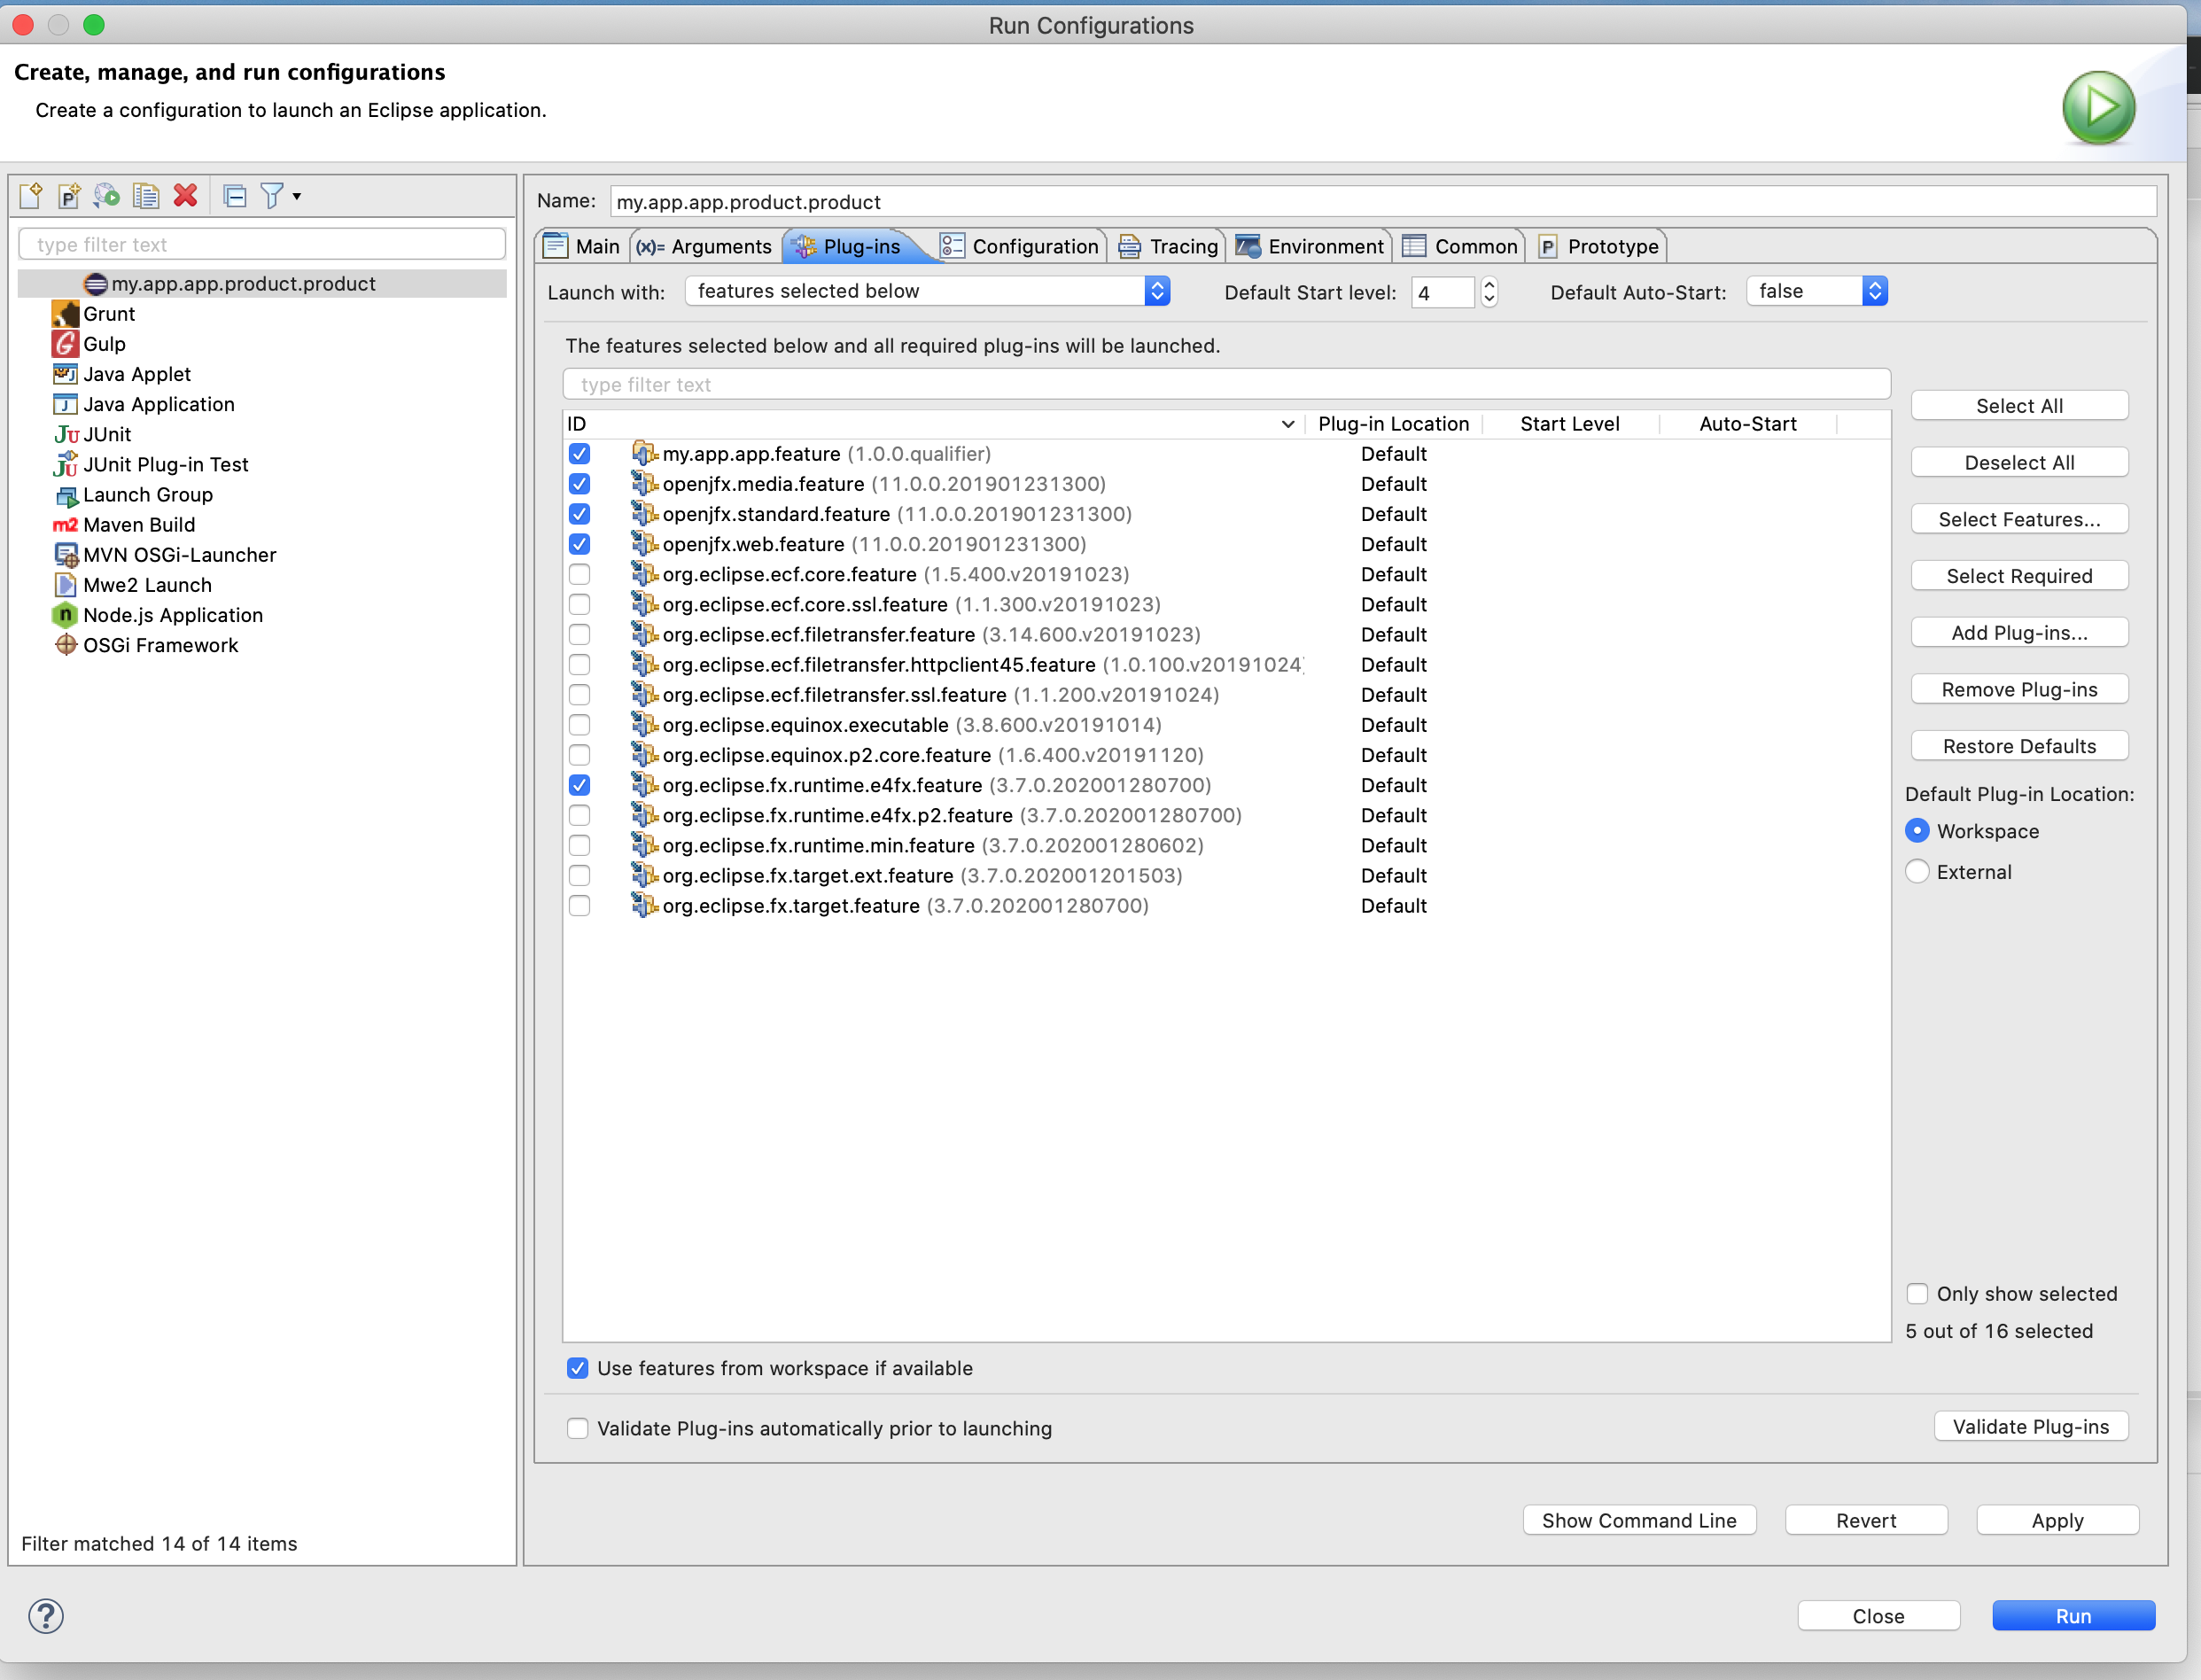
Exporting your application
The project wizard already generated the basic infrastructure for you but we need to make some small changes. We assume you've chosen to option to ship the JavaFX-modules as part of the plugins-directory to keep it simple. The wizard already added the JavaFX-Standard-Feature into your product-File 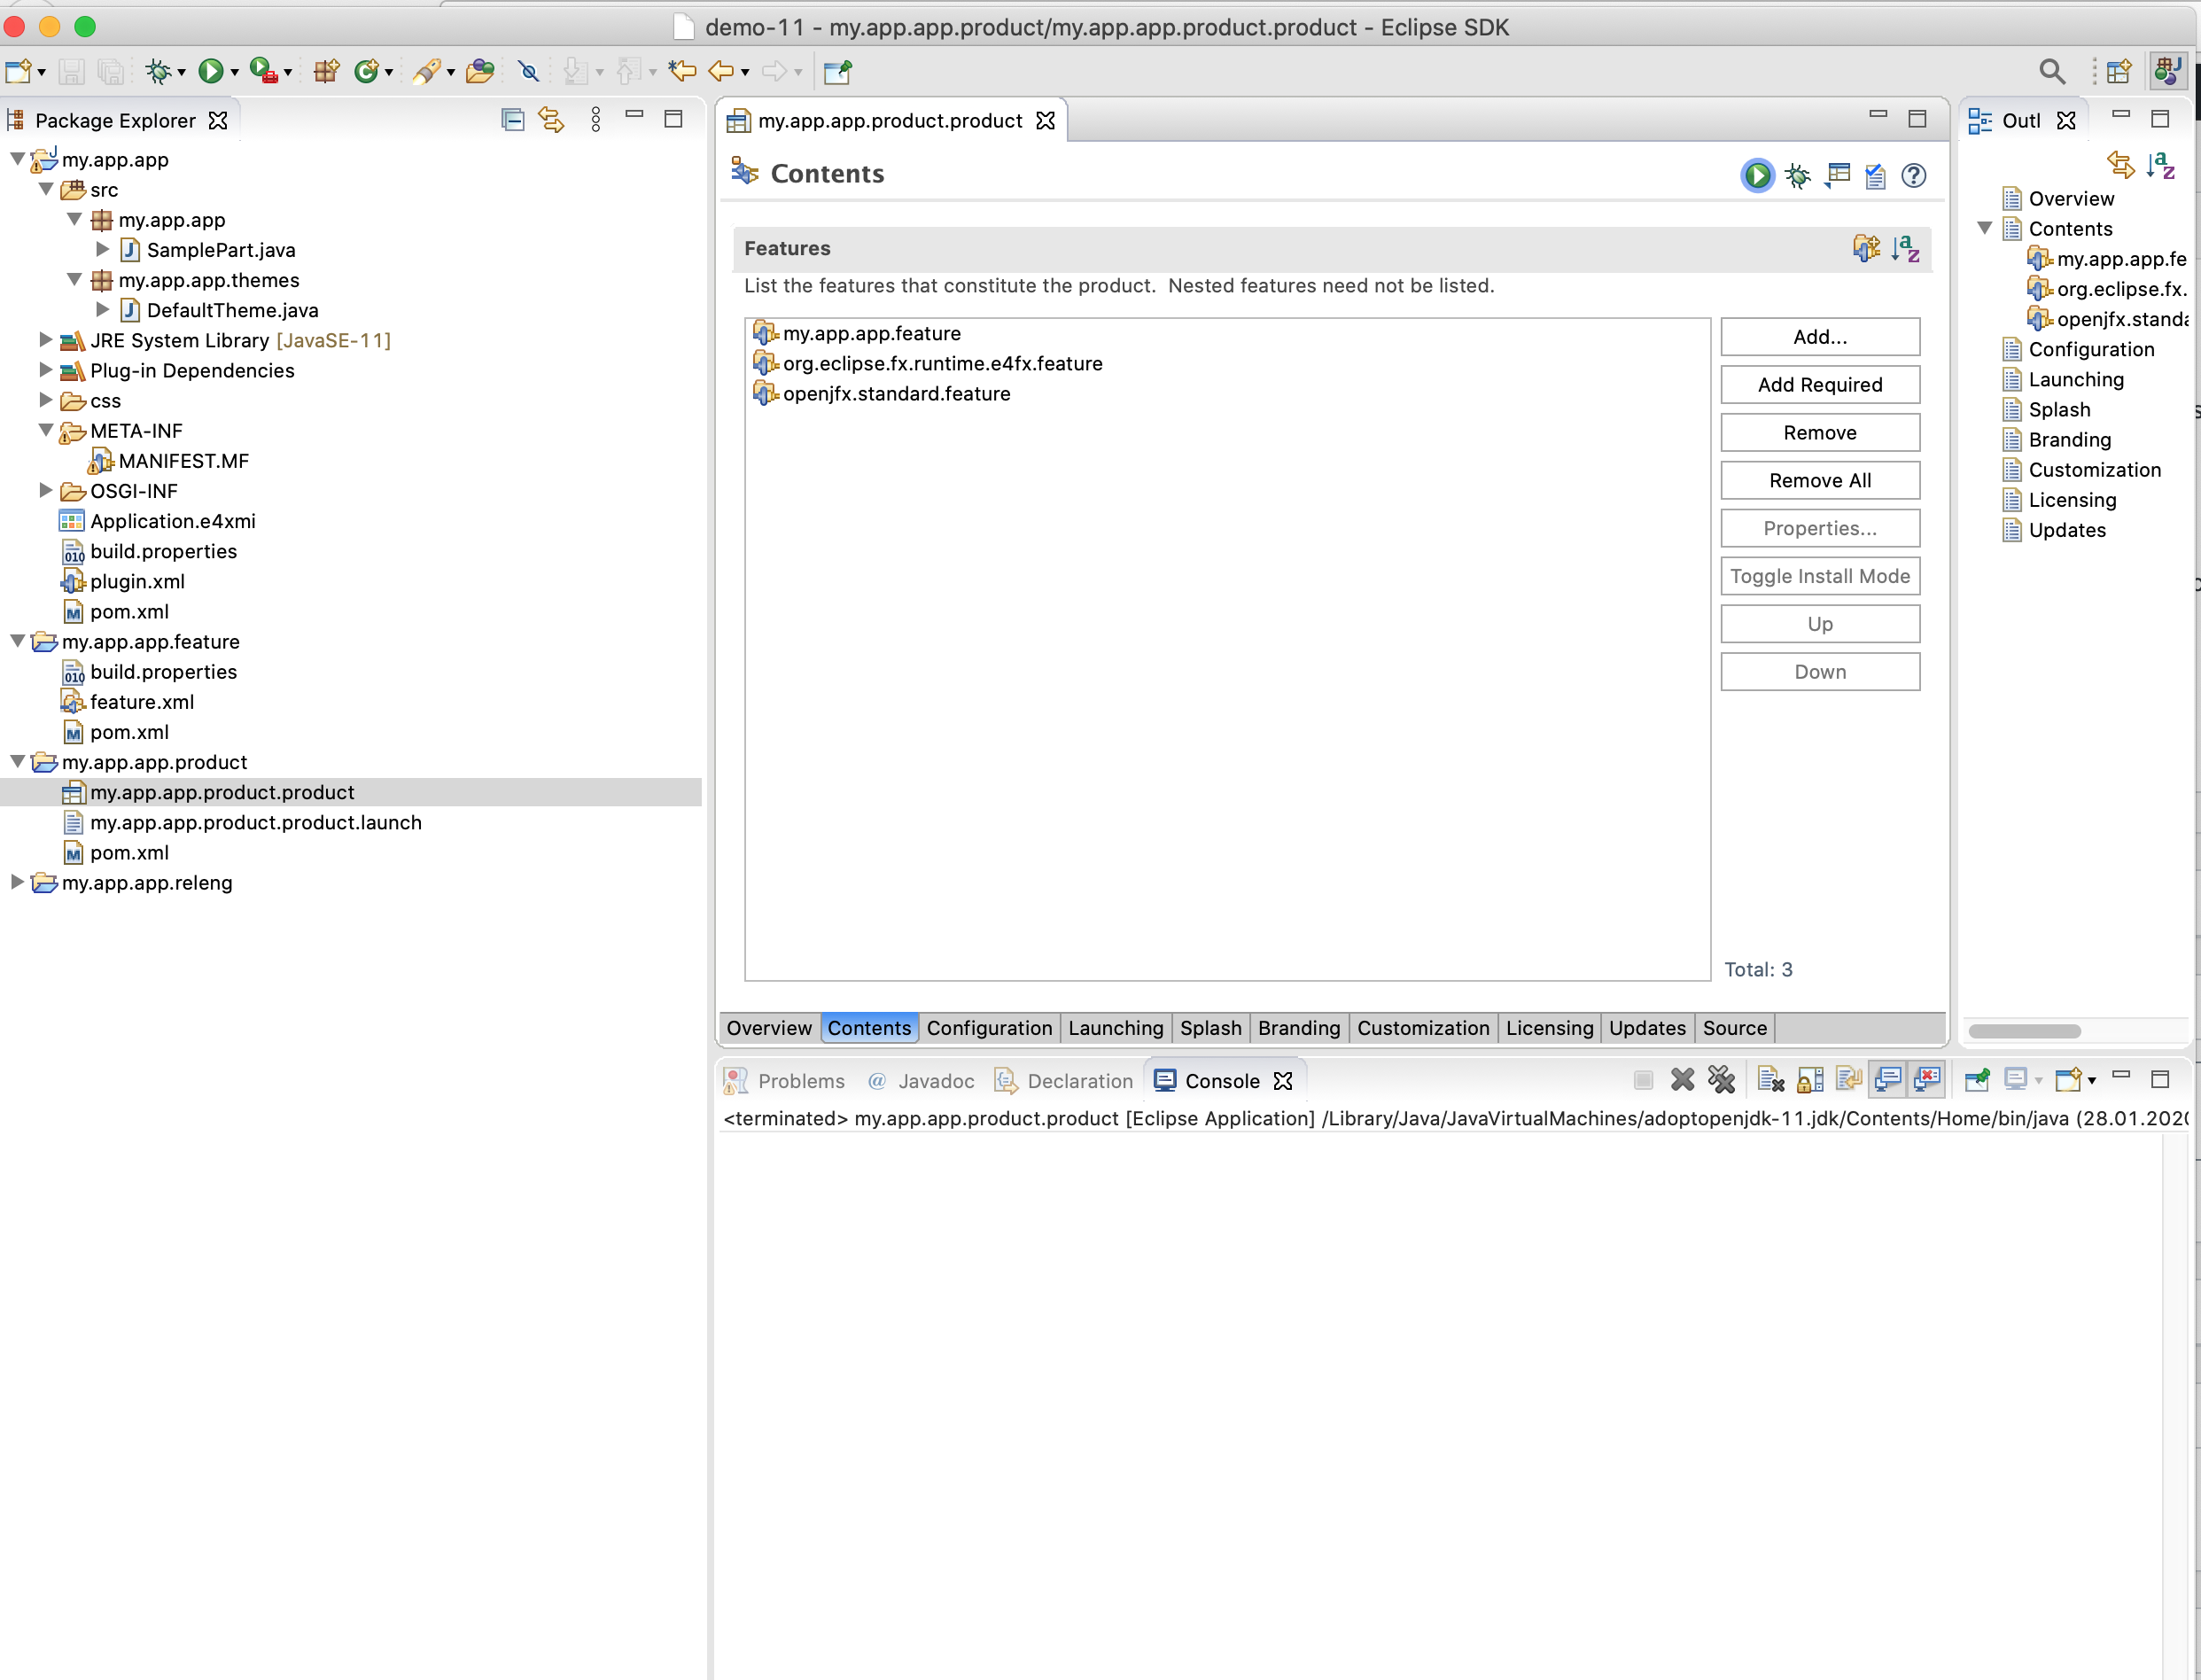 It also added the parts to satisfy the compiler in your releng/pom.xml
 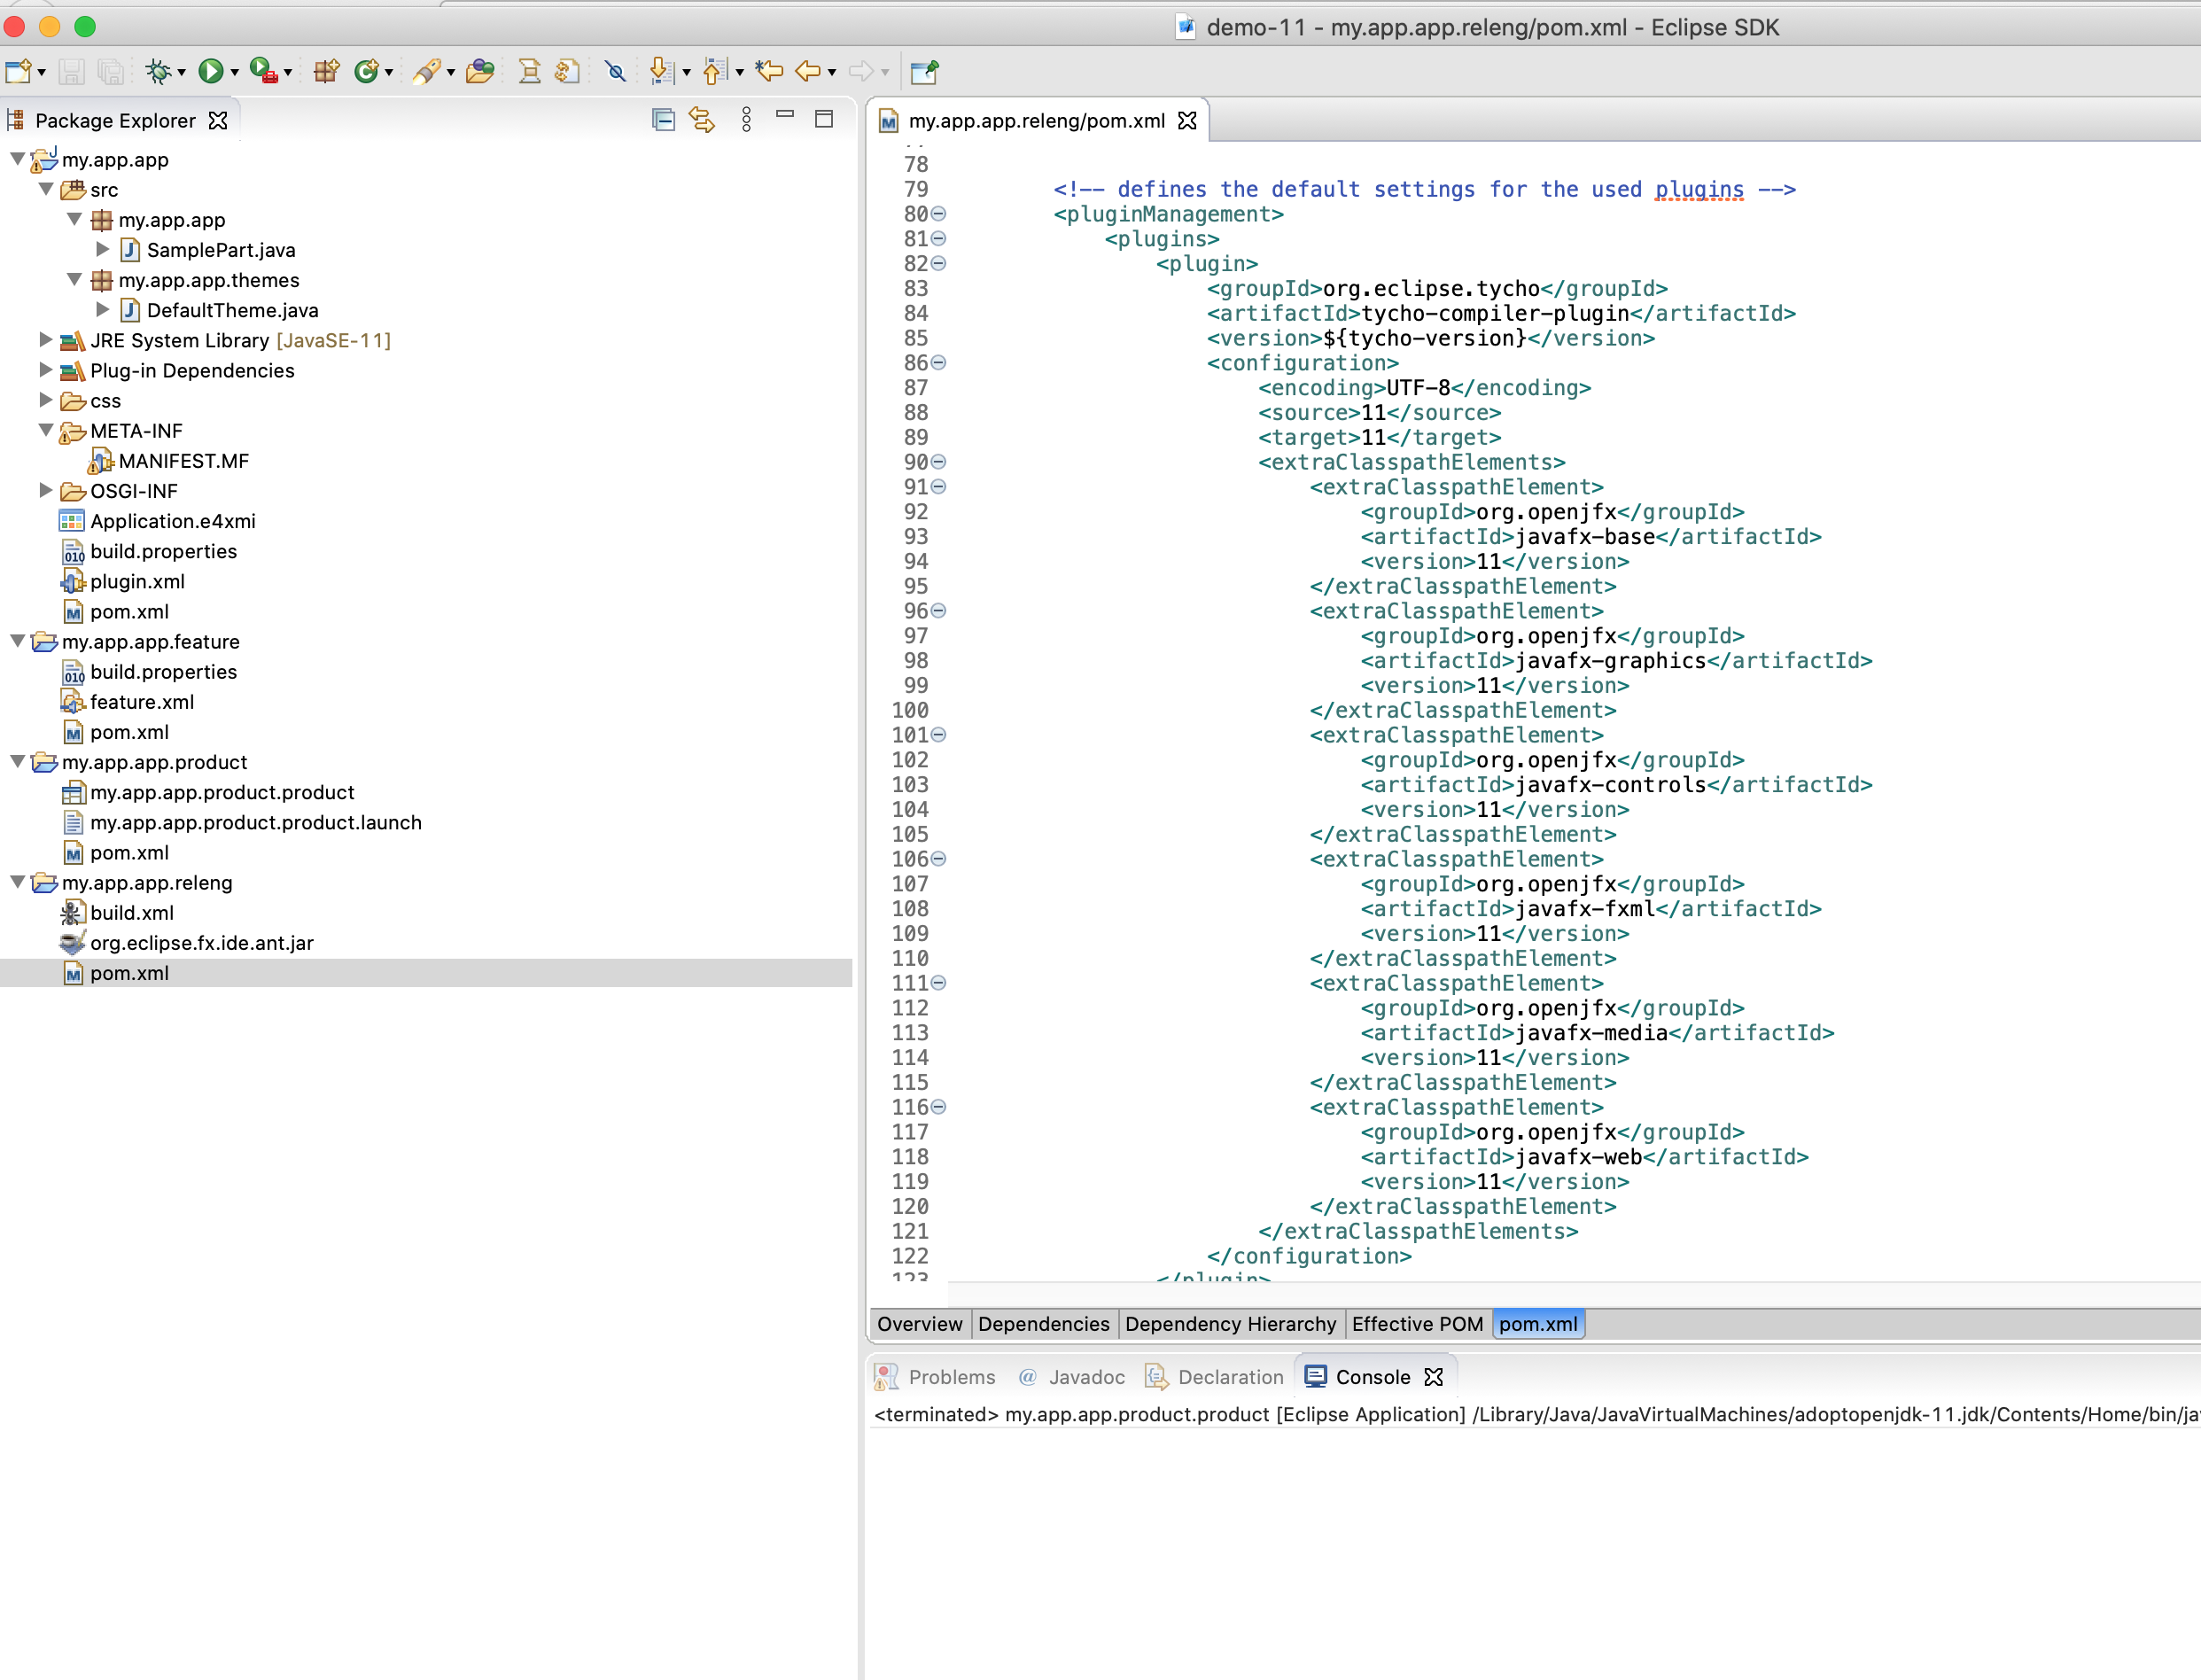 While most of the stuff is already in place we need to make 2 small modifications:
- Update the tycho-version property to 1.5.0
- Change the export environment to match the operation-system(s) you want to target
- Windows: os=win32, ws=win32, arch=x86_64
- Linux: os=linux, ws=gtk, arch=x86_64
- OS-X: os=macosx, ws=cocoa, arch=x86_64
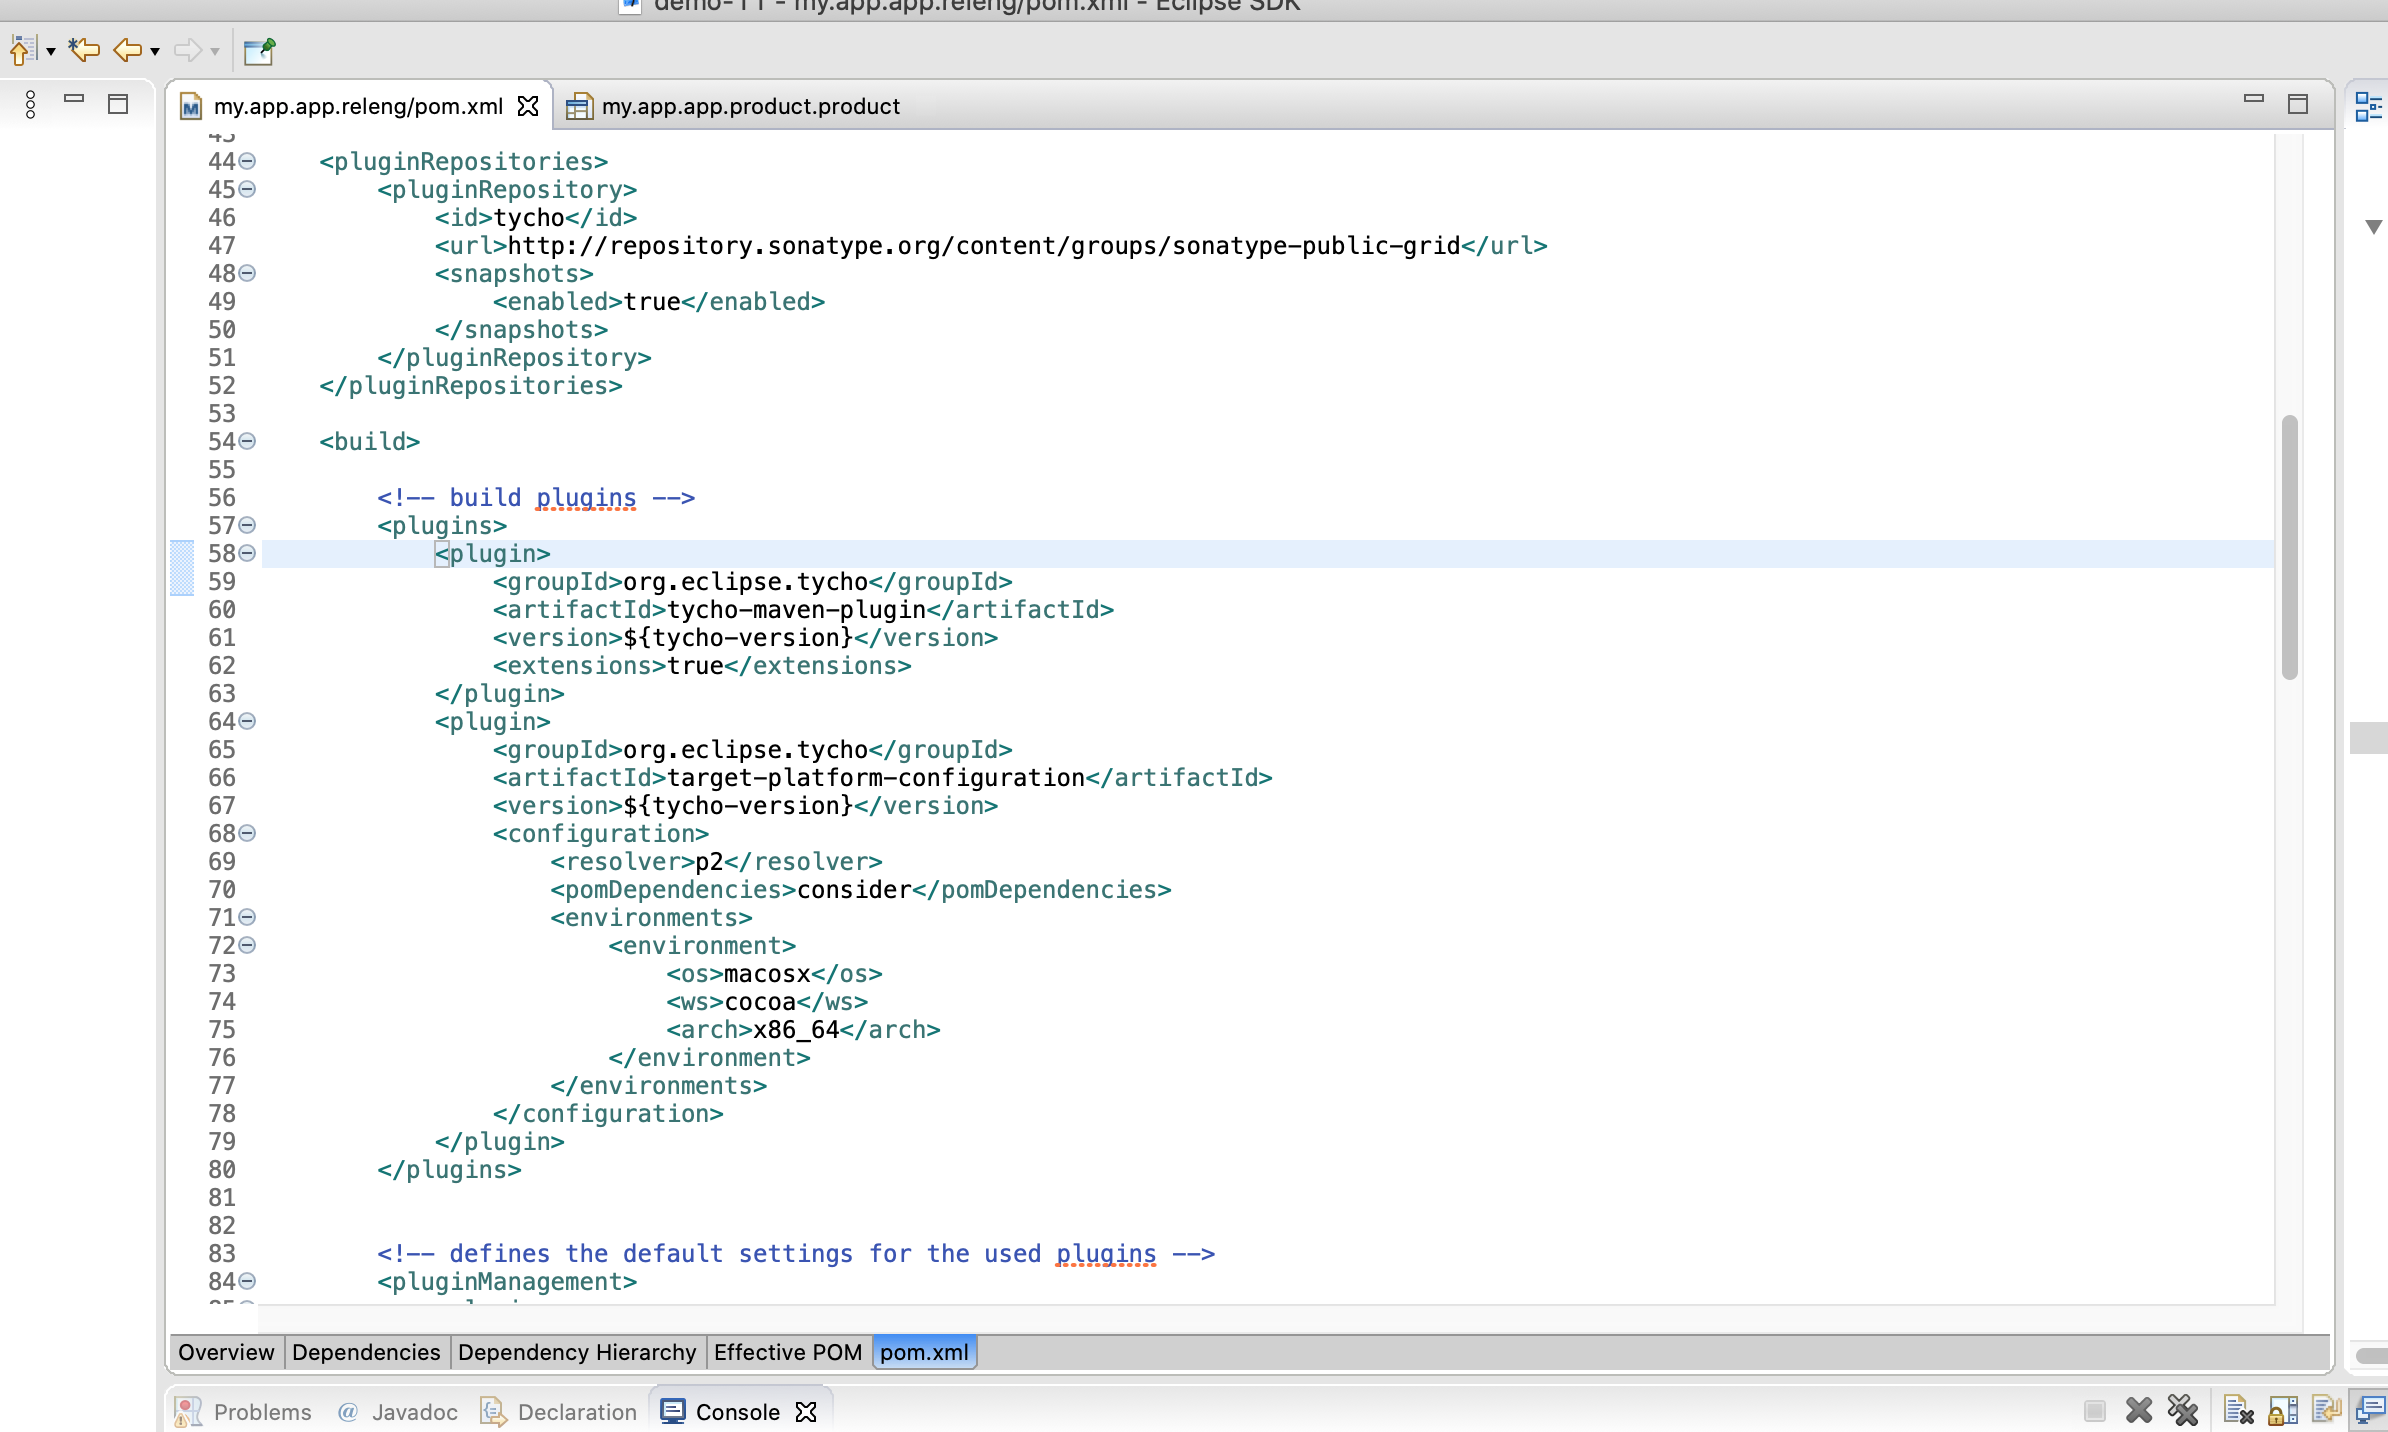
Producing a native launcher
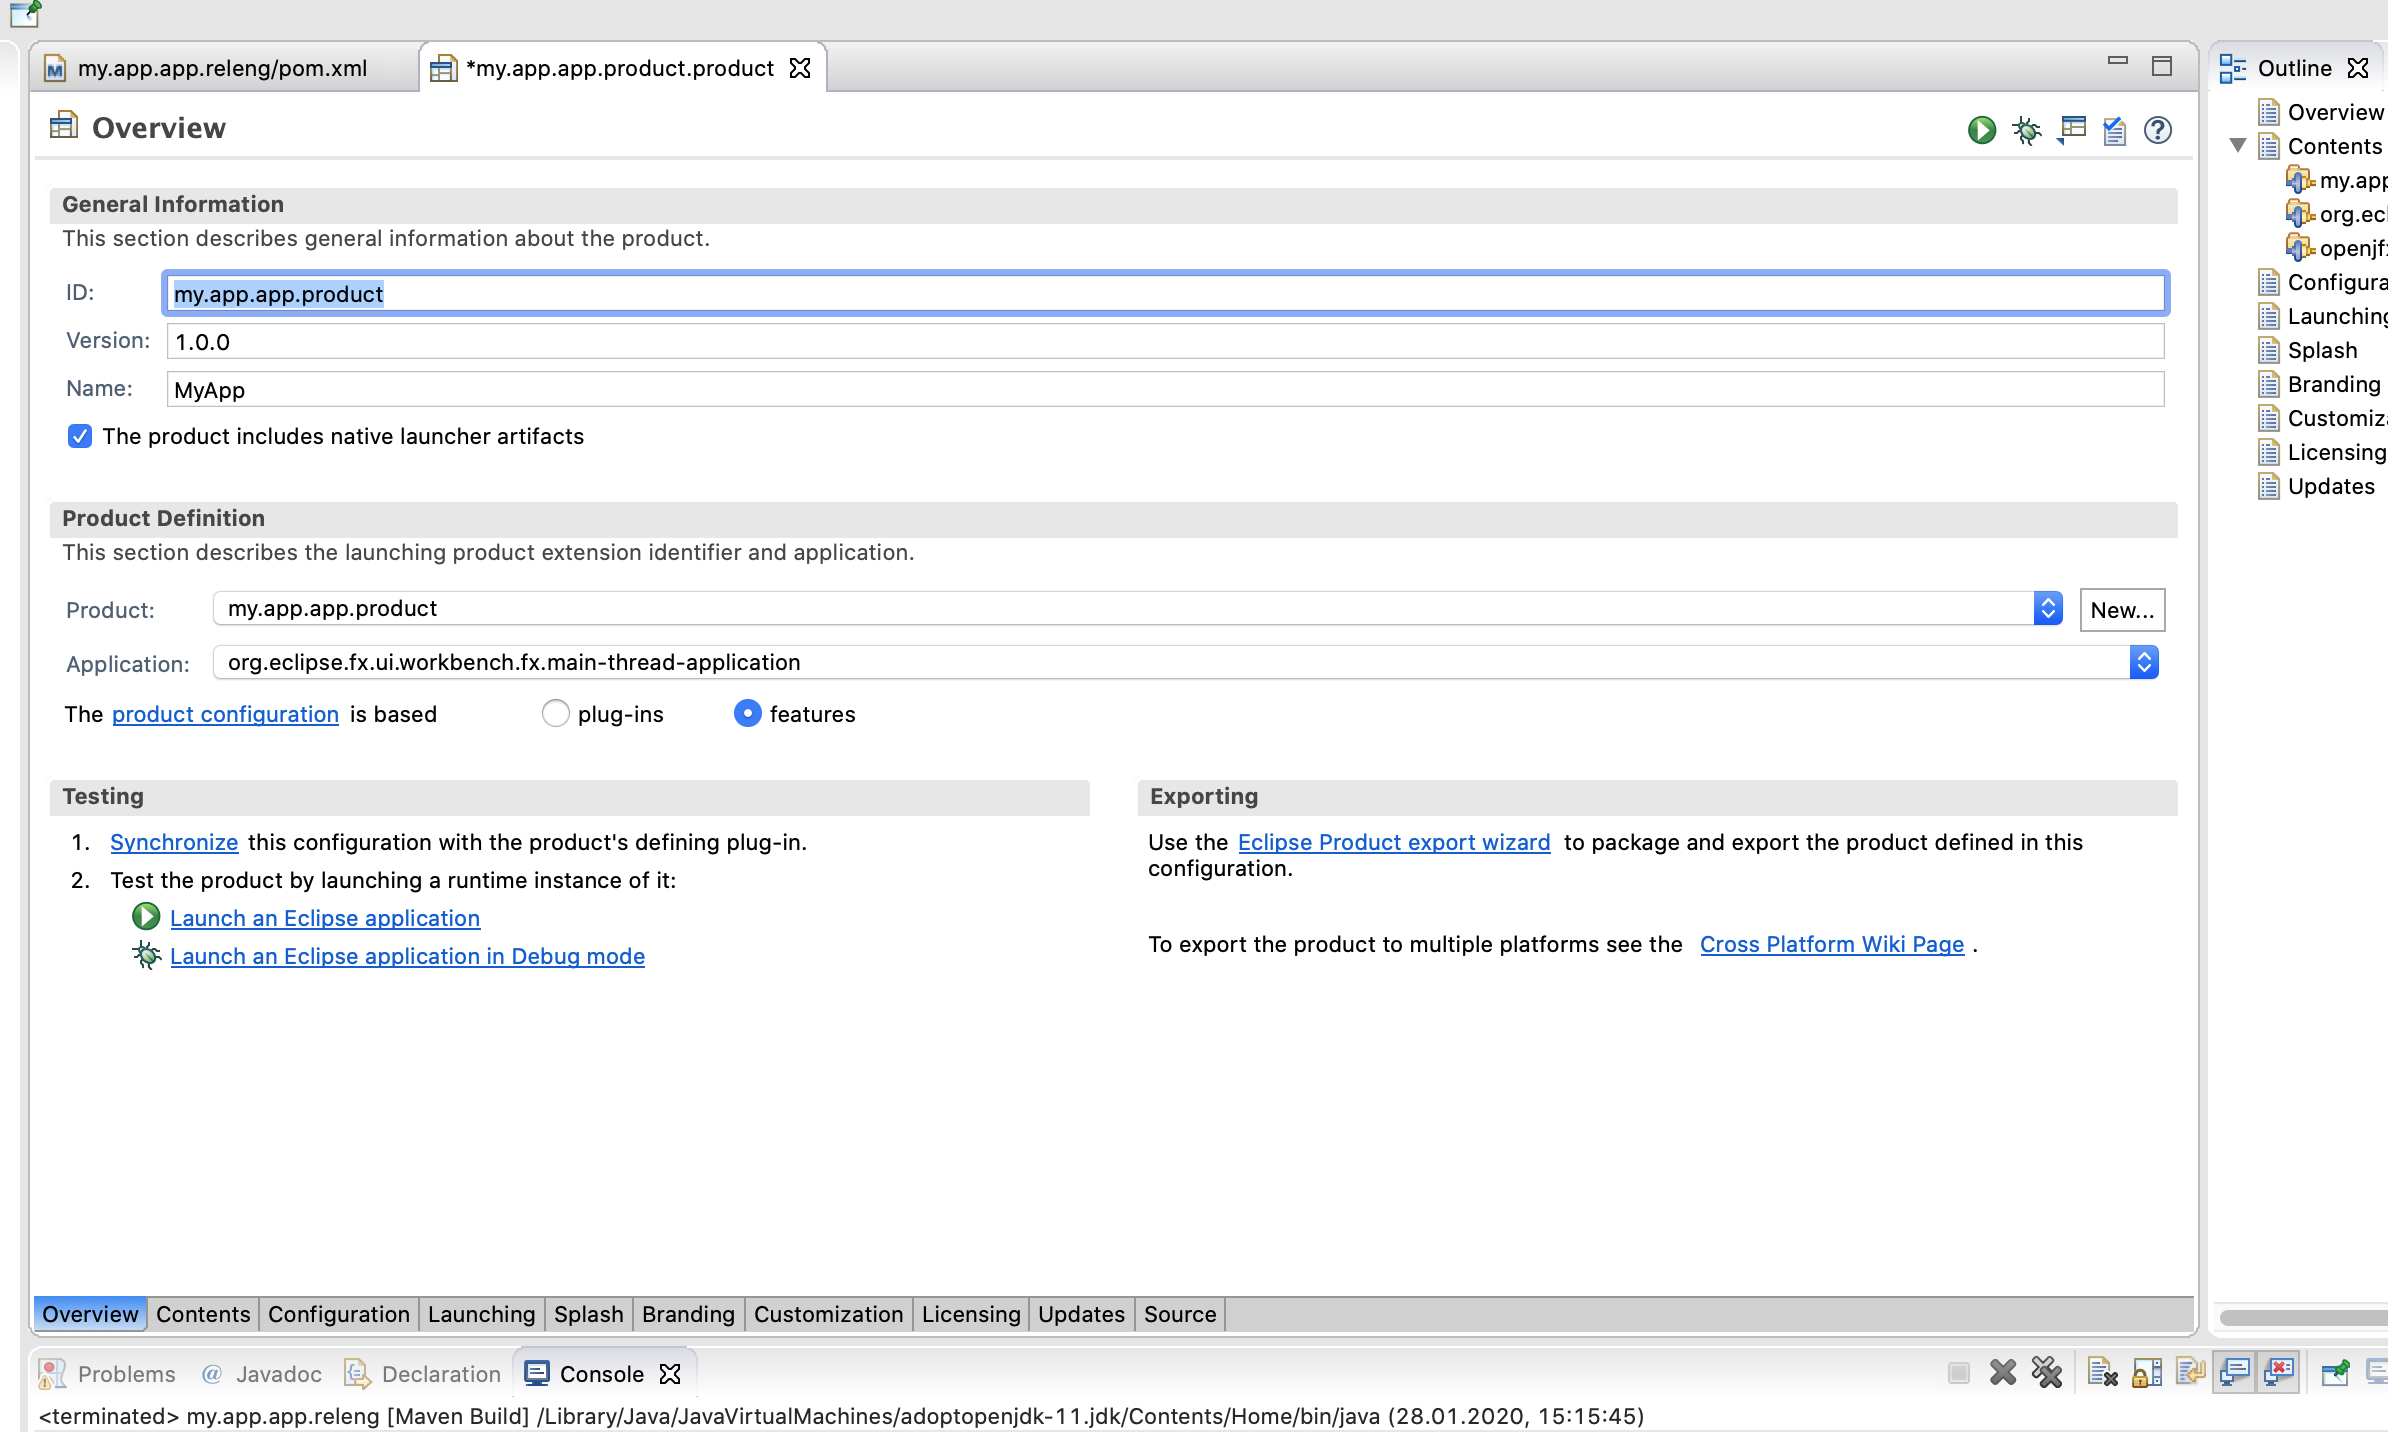
As we anyway have to produce a platform-dependent we can also add the creation of a native launcher. For that open your .product-File:
- Tick the "The product includes native launcher artifacts"
- Change the application to main-thread-application